


How to Implement Schema Markup with GTM? Implementation in Stages
A few years ago, brands often viewed schema markup as highly technical SEO work that took a long time to implement. Today, it has become an optimization that websites aim to put in place quickly.
The importance of schema.org has continued to grow since 2011. Structured data helps increasingly sophisticated search engines understand website content more clearly. Depending on your site's structure, the available markup types can also improve how your pages appear in the SERP and support your SEO strategy.
In this article, I will show you how to apply schema markup to your site through Google Tag Manager with almost no software knowledge.
What is Google Tag Manager?
You have probably heard of Google Tag Manager before. Used properly, it is a powerful tool that can make many tasks easier.
In simple terms, Google Tag Manager is a free tool from Google, like Search Console and Analytics. It lets you track whether visitors complete specific actions without changing the code blocks on your site or application.
GTM is a tag management system that lets you create and distribute different tags, including Analytics, Remarketing, and Transactions, through a container placed on your website.
One of GTM's biggest advantages is that you can set up event tracking without touching the site's code. As the example below shows, this also reduces the concern that the setup will break your website.
For more detail, read What is Google Tag Manager by Mert Vahit Demir from our team. The article covers event identification and tracking with GTM.
In this guide, we will use the tool to add structured data markup to a site and create an opportunity for a competitive advantage.
What Structured Data Markup Can We Use with Google Tag Manager?
Structured data markup is a valuable area of optimization and one I particularly enjoy working with. Many sites use it, although their implementation strategies are not always effective. We can provide almost all the markup through GTM.
For more information about schema markup, visit schema.org.
Structured data markup is available in several formats. I will use JSON-LD in this guide.
Let's work through the process step by step.
Note: The steps below assume that Google Tag Manager is already installed.
If it is not, you can learn how to install it here.
Structured Data Markup Stages with Google Tag Manager
Stage 1:
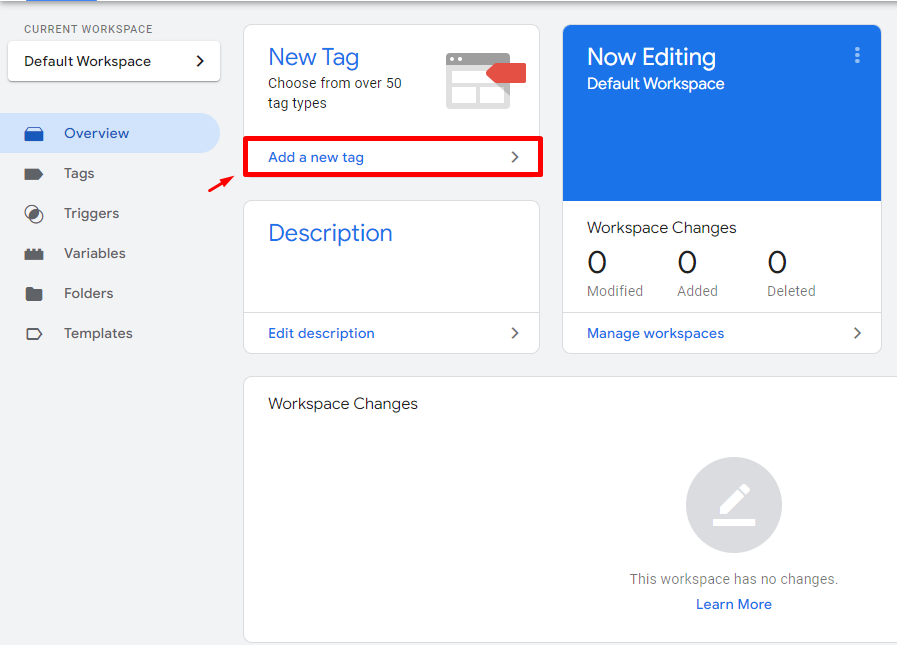
From the main GTM interface, click "Add New Tag" to create a tag.
** **
**
Stage 2:
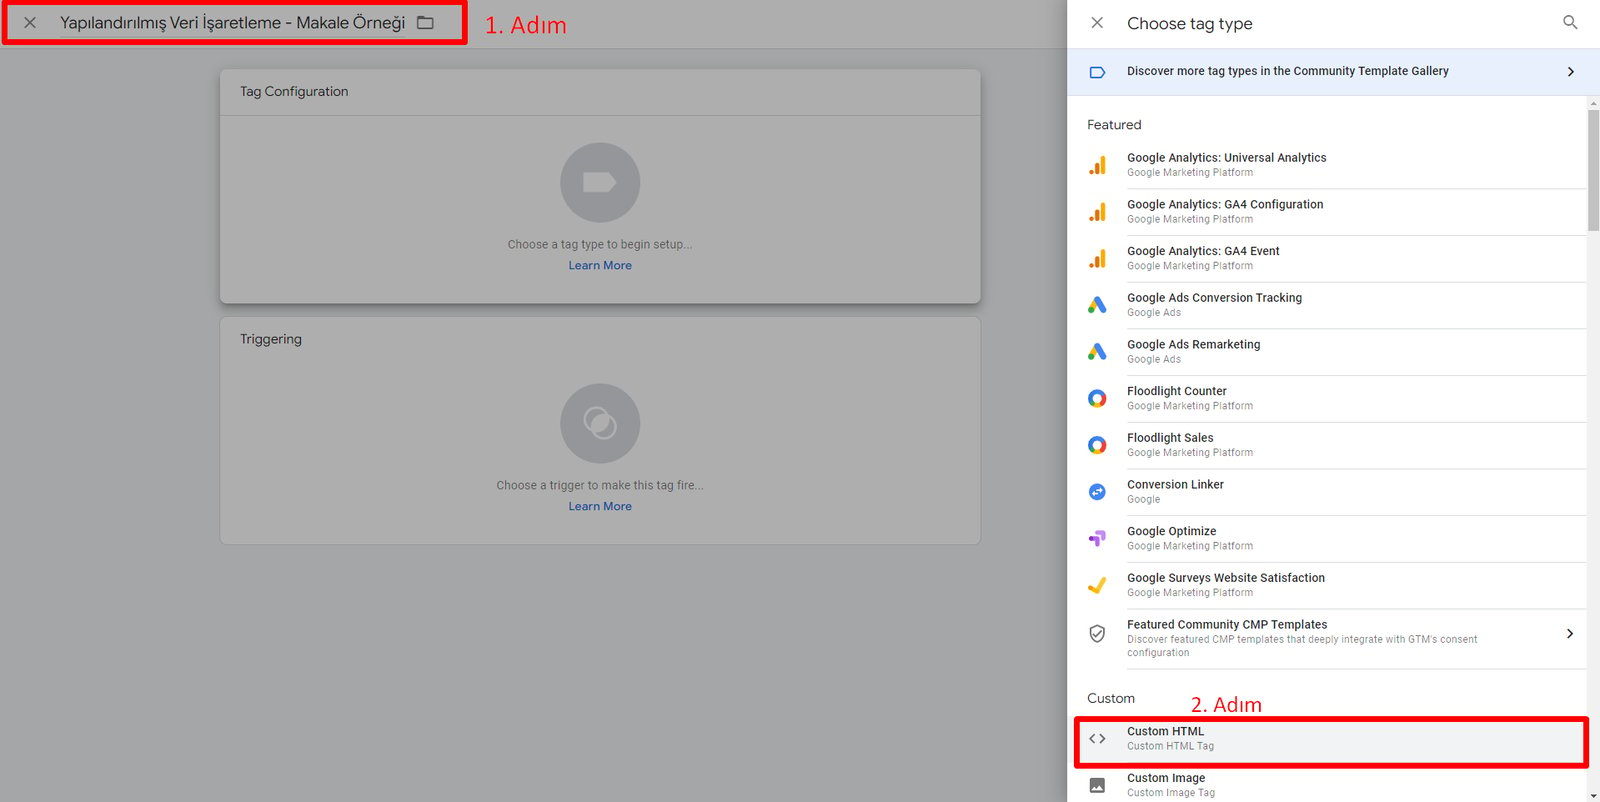
Give the tag a name that will help you remember what it does. Then click Custom HTML in the section on the right.
Stage 3:
The next screen contains a field for code. Add the schema code you want to use here. I will use LocalBusiness markup as the example.
You can also add other markup types, such as FAQ or Organization markup, because GTM lets you apply the code fragment to one page, several pages, or every page.
You can create the relevant code with a schema markup tool or review it directly on schema.org.
Example code: <script type="application/ld+json">
{
  "@context": "http://schema.org",
  "@type": "LocalBusiness",
  "address": {
    "@type": "PostalAddress",
    "addressLocality": "Zeo Istanbul",
    "addressRegion": "TR",
    "streetAddress": "Zühtüpaşa,Archerson Kadıköy,Şefik Bey Sokak NO:3 34724 Kadıköy/İstanbul"
  },
  "description": "Pazarlama Ajansı",
  "name": " Zeo Teknoloji A.Ş ",
  "telefon": "0216 336 90 37"
}
</script>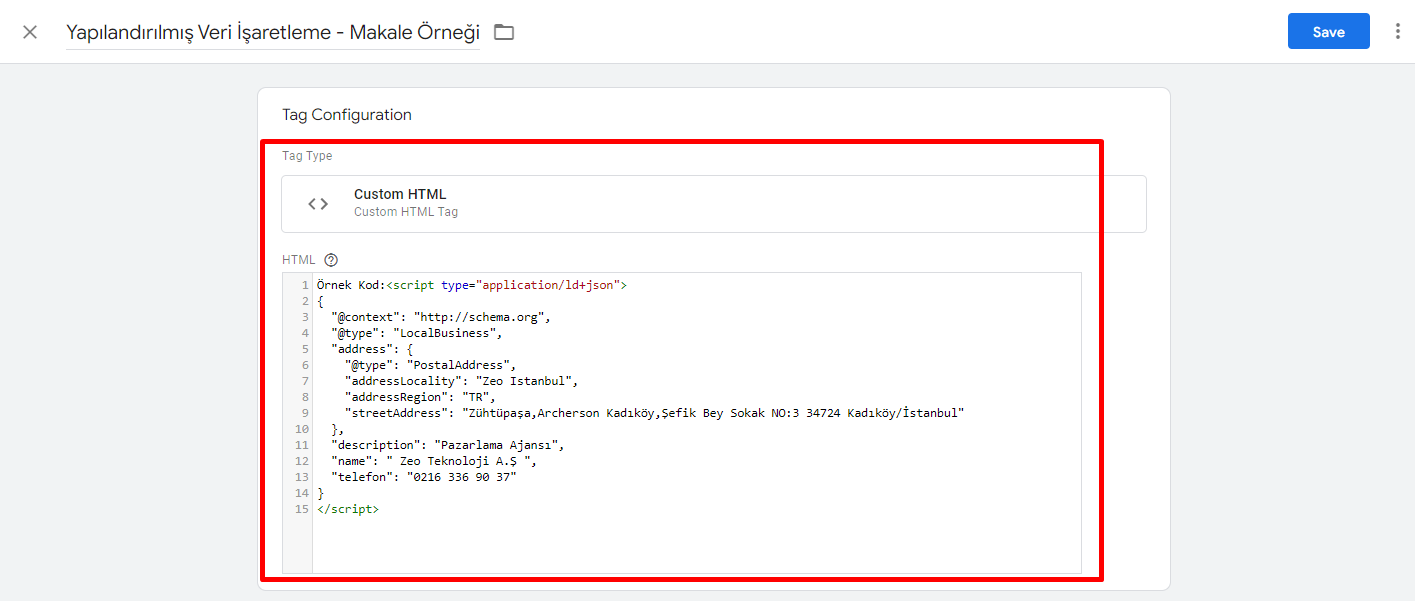
Stage 4
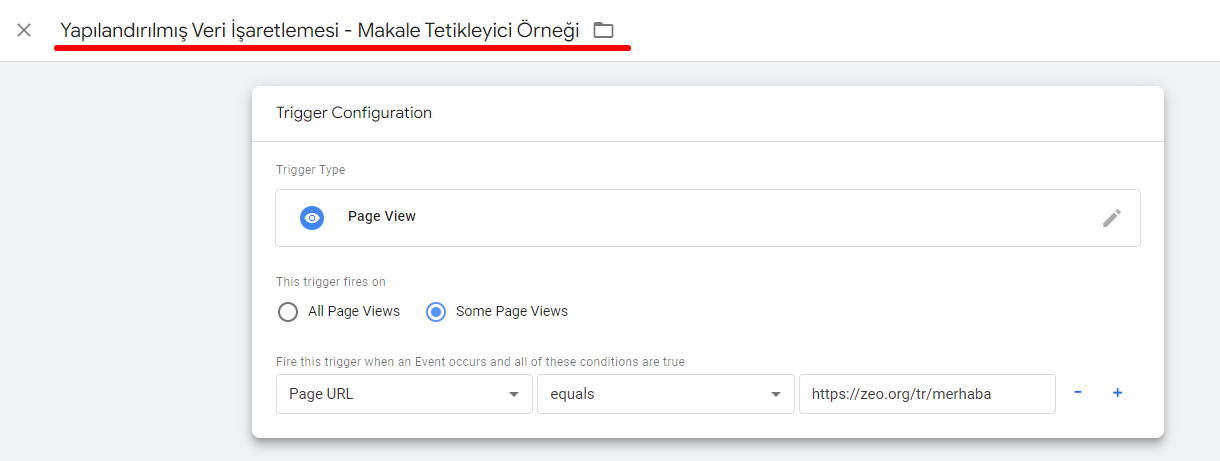
Next, set the tag's trigger. You will find the Triggering section directly below the tag configuration.

This setting determines which pages will trigger the tag.
Because we will use this markup on the Contact page, I select some pages.
For a markup type that should appear on every page, we would select All Pages.
Stage 5
After completing these steps, click Save at the top of the page.
Stage 6
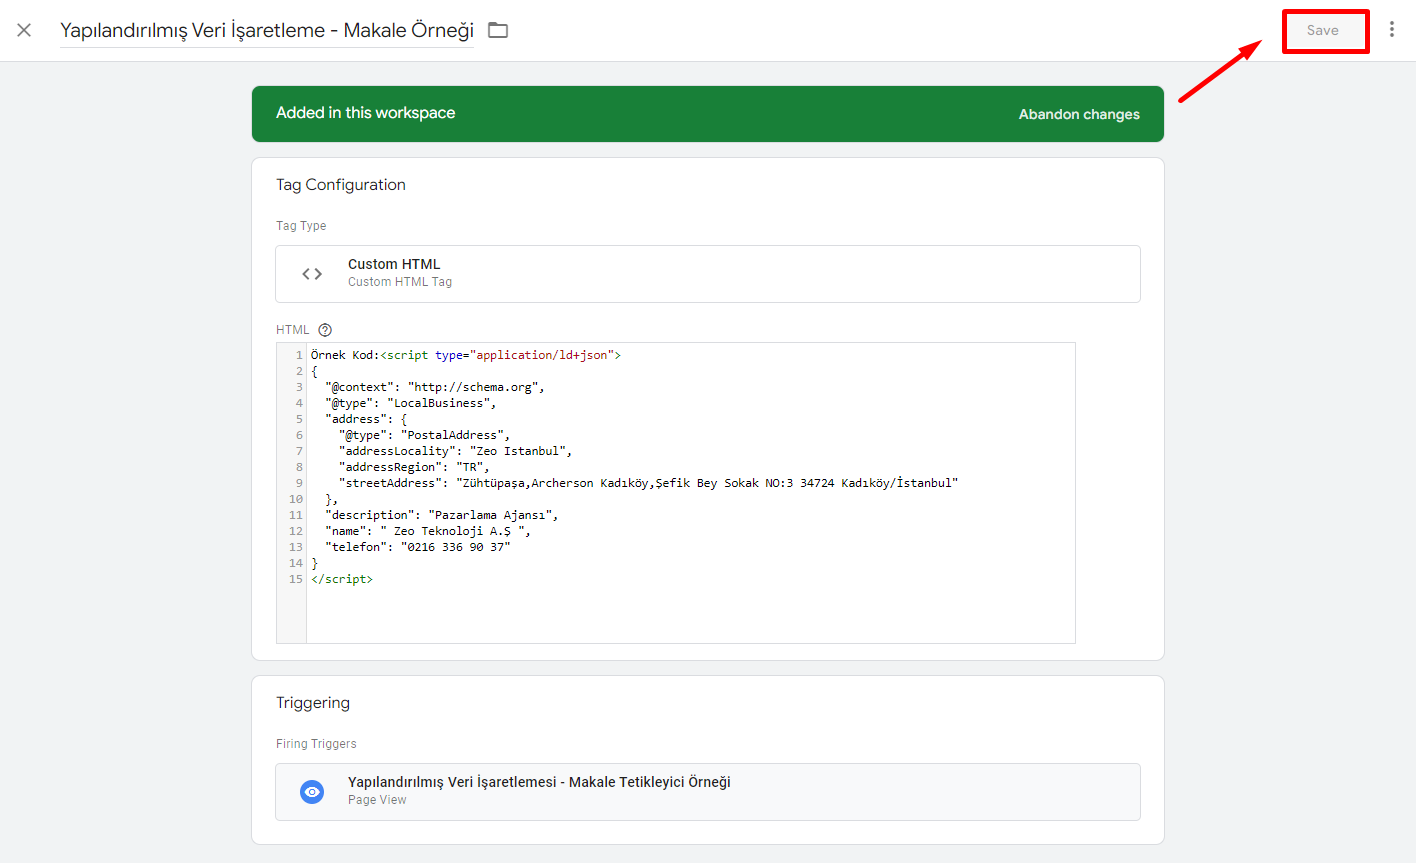
Now it is time to test the new tag and release the GTM container.
GTM's "Preview Mode" lets us debug the tag before publishing it.
This means we can test the tag before adding the code to the live site.
Our tag is now ready, but first we need to confirm that it works properly.
Click the drop-down arrow next to the Publish button, then select the debug option.
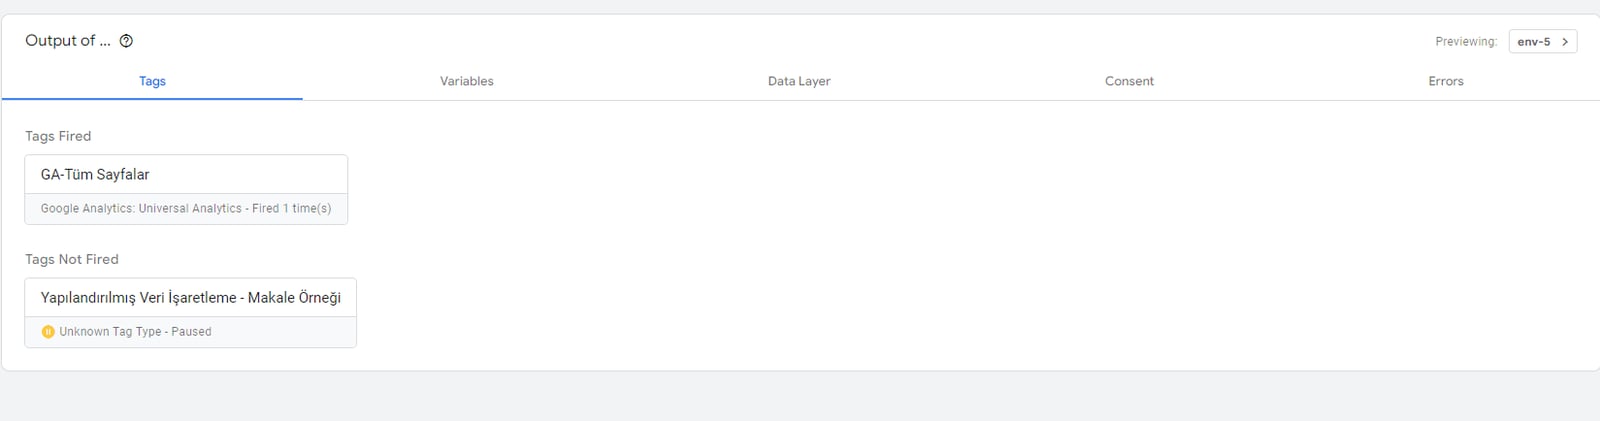
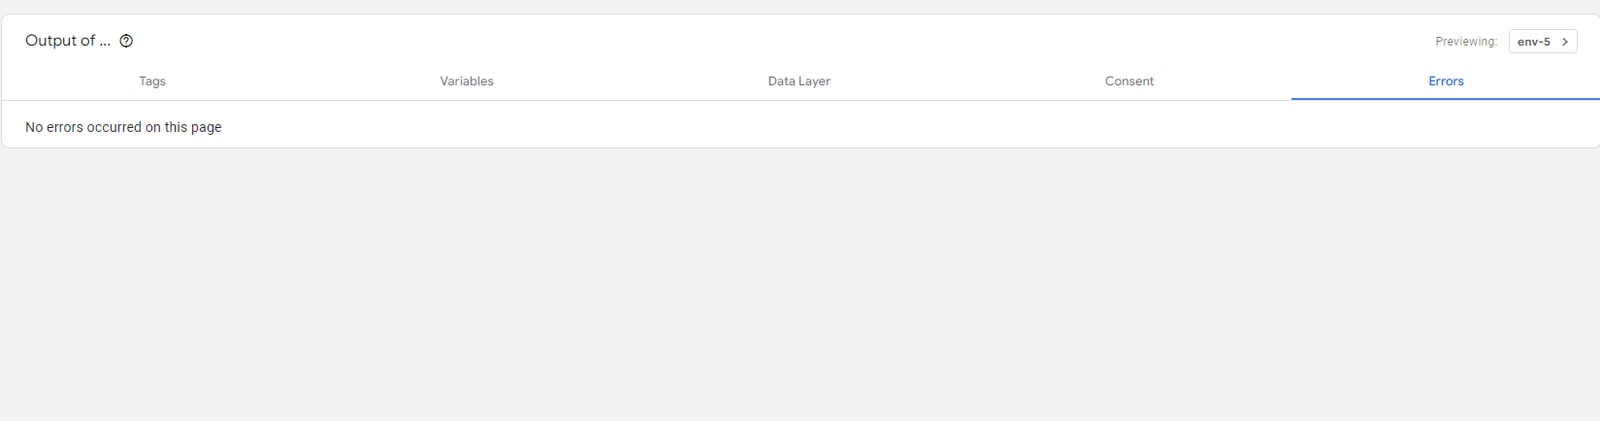
As shown above, there is no error.
Stage 7
Once you have confirmed that the tag works properly, click the publish tab in the top-right corner of GTM. A prompt like the one below will appear.
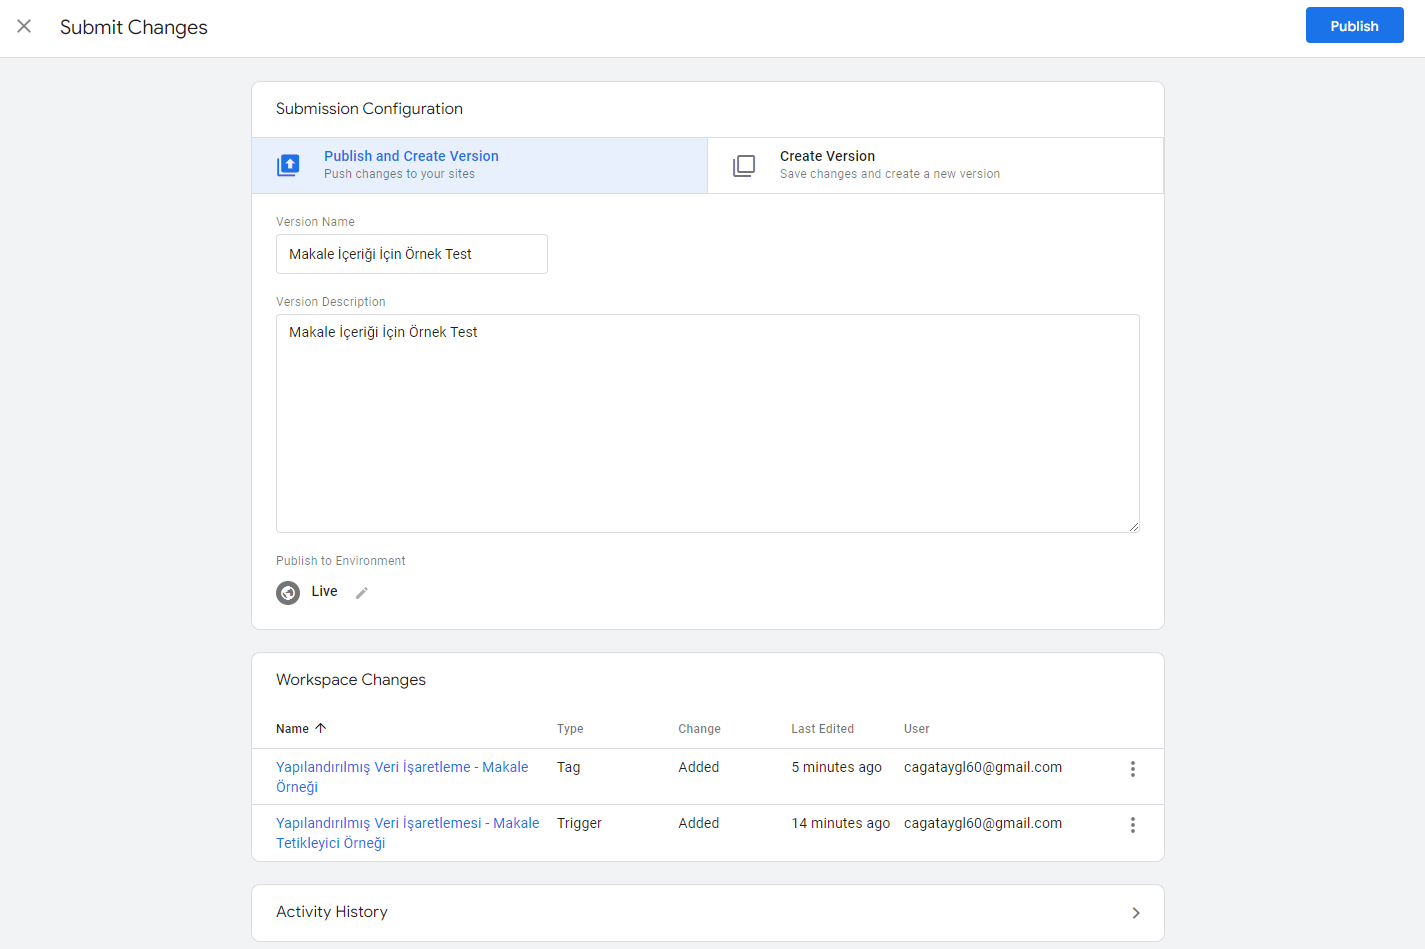
Add a name and description for the new version so that you can remember the changes it contains.
Then click Publish to complete the optimization. Continue testing it after publication to make sure it keeps working as intended.


