


Google Analytics and Search Console let you examine and analyze the data behind your site and its pages. With what you learn there, you can run your own analyses and build on the strategy you offer the businesses you consult for. Every so often, we add an eye-catching button to send users to product or service pages, or we choose to collect conversions with a form in a pop-up. Sometimes a client simply asks us to report the click data for those buttons.
We will start with the basics, introduce the Google Tag Manager tool, and cover the metrics that will help you. Toward the end, we will walk through an event assignment using a sample definition. And there is plenty of useful information along the way.
What is Google Tag Manager?
Google Tag Manager is a free tool from Google, just like Search Console and Analytics. It lets you track whether a visitor action was completed without touching the code blocks on your site or application.
You are probably wondering how that happens without any software work on your end. The logic behind GTM is simple. Information from your site is sent to Analytics through Google Tag Manager. In other words, Google Tag Manager acts as the bridge between your site and Analytics, carrying your site's data through the tracking code. GTM takes the information it receives from your site and shares it with another data source.
Additional Information: You can check whether your site already has a GTM code with Google's free Tag Assistant Chrome plugin. You can find the Tag Assistant Chrome extension here.
How to Install Google Tag Manager?
If you already know how to set up Google Tag Manager, skip ahead to the next section on GTM's components. Otherwise, follow the steps below to create a Google Tag Manager account quickly.
Sign in to Google's free Tag Manager product with your Google account, then click the Create Account button and fill in every field.
In the Install Google Tag Manager section, add the first code block between the <head>...</head> tags in your source code, and place the second code block inside the <body>...</body> block. After that, check whether your site now carries a GTM code using the Tag Assistant Chrome plugin that Google offers for free. You can access the Tag Assistant Chrome plugin here. If GTM is running smoothly, keep reading to pick up everything else you need to know.
Components of Google Tag Manager
Google Tag Manager has three main parts: tags, triggers, and variables. Alongside these components, we will also cover the data layer.
What is a Tag?
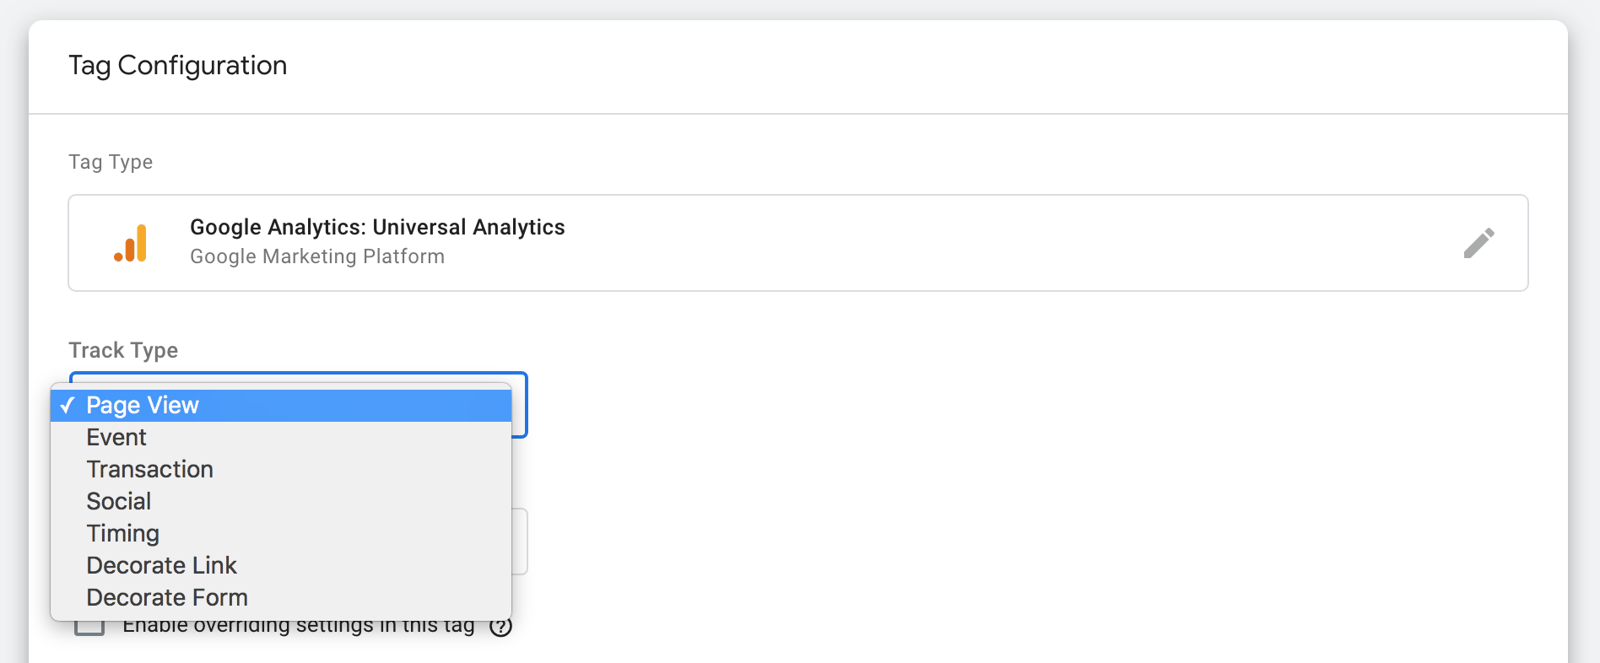
A tag lets you pull information from a specific section and drop a snippet of code into the HTML or JavaScript part of your site. The tag tells GTM what it needs to do.
For example, by creating a tag you can see how many people filled out the form on your product page. Just make sure you choose the correct tracking type for the tag you create.
What is Trigger?
Tags created in Google Tag Manager fire on actions such as views and clicks. A trigger holds the conditions that decide when a tag fires and when it is blocked.
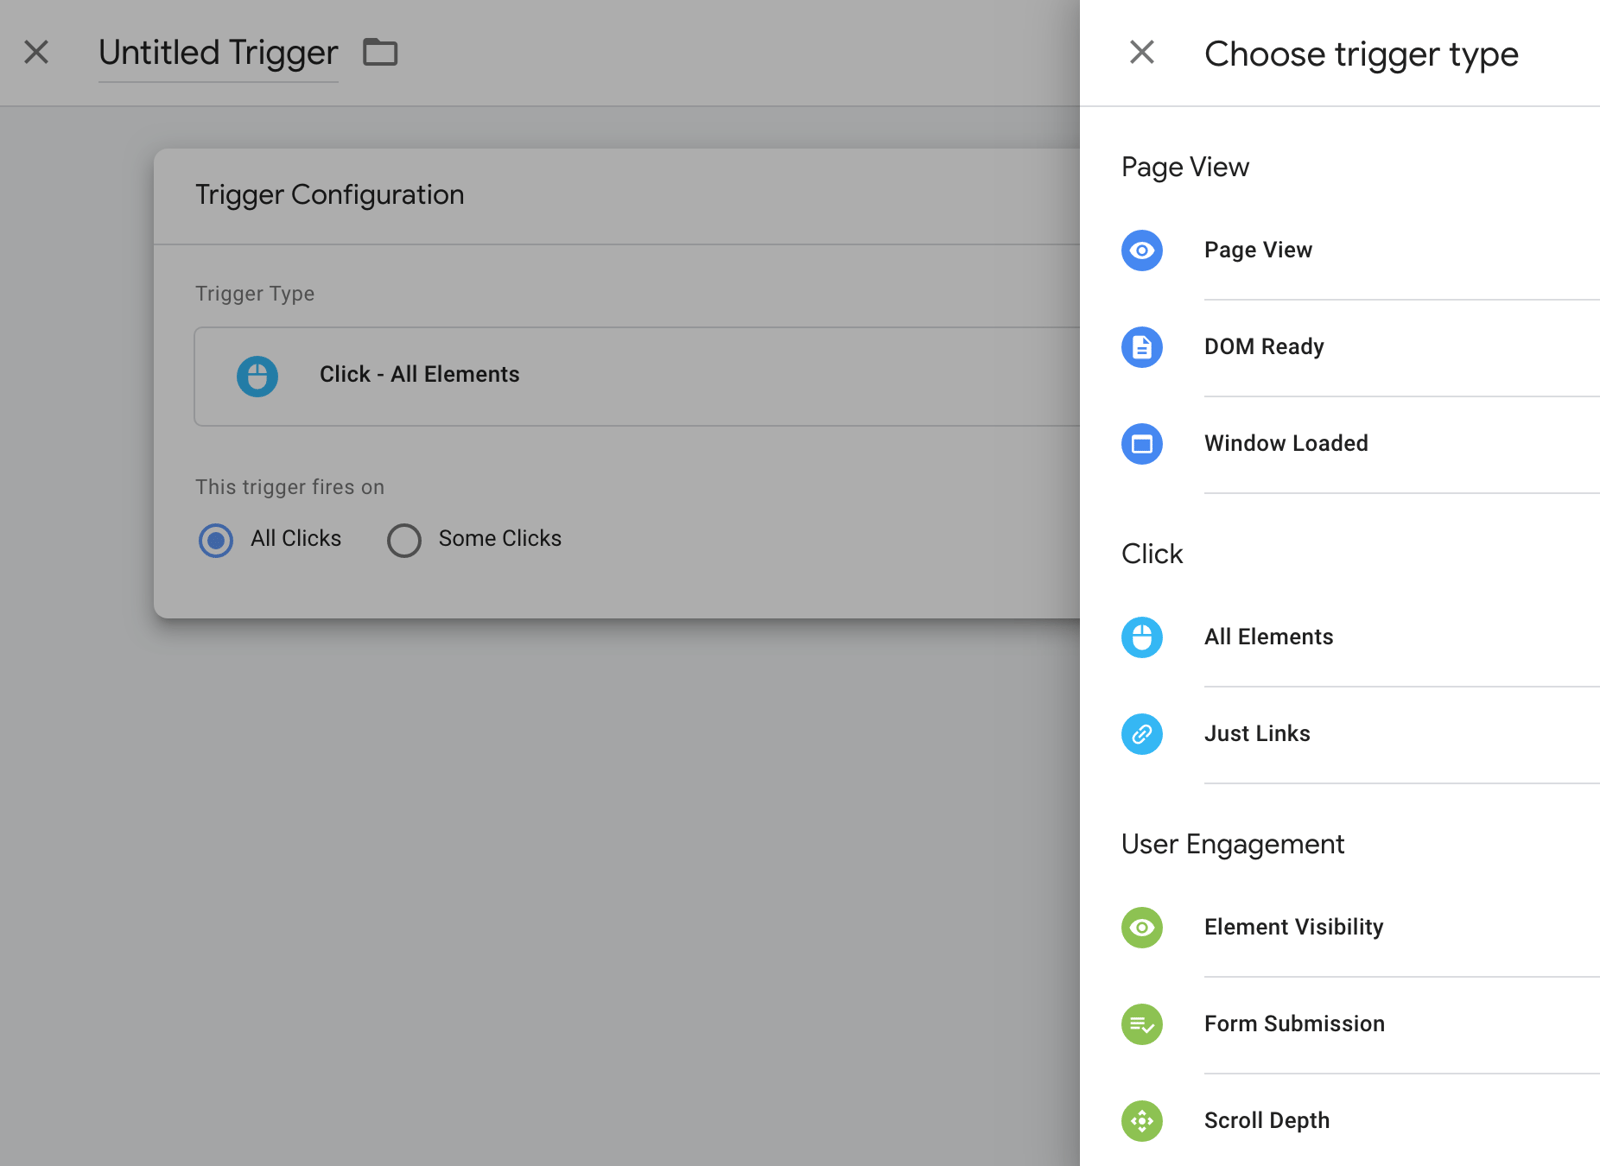
You need to set the right trigger type and the conditions under which it runs. So how do you know you have set those conditions correctly? The practical example at the end of this article walks through it.
What is Variable?
When you build a trigger, the conditions you set rely on variables. A variable is a placeholder for a value, the spot where that value sits. It holds changing values such as a product name, an id, or a price.
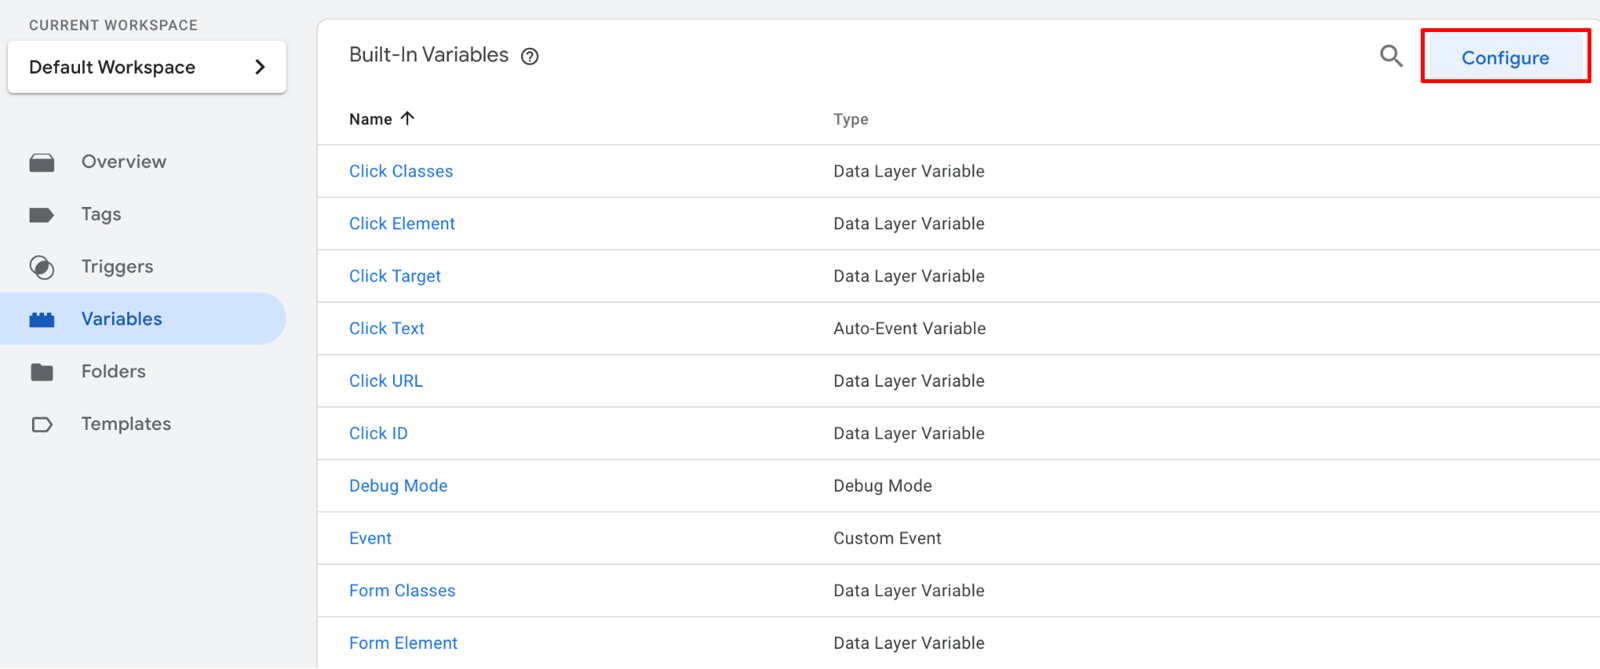
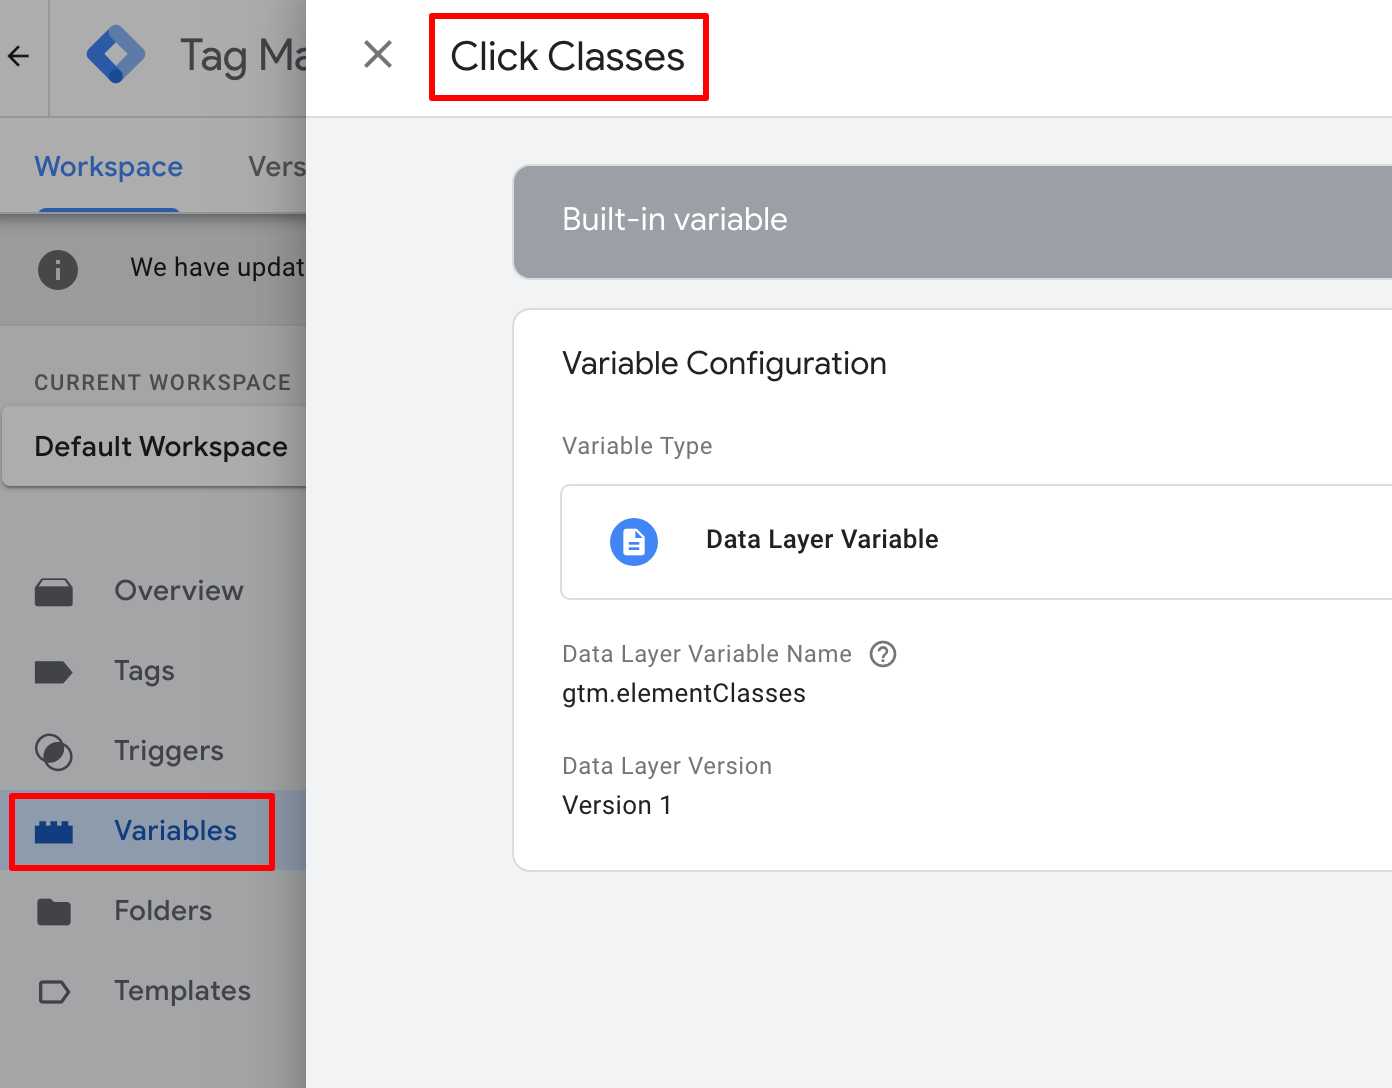
For example, you can see a screenshot of the click classes built-in variable below.
What is Data Layer?
A data layer is a JavaScript-based object that carries data from your site or application to Google Tag Manager. GTM uses the data layer to hold that data temporarily. It is also worth noting that you will get the best performance when you work with a data layer. For building one, take a look at the Google source.
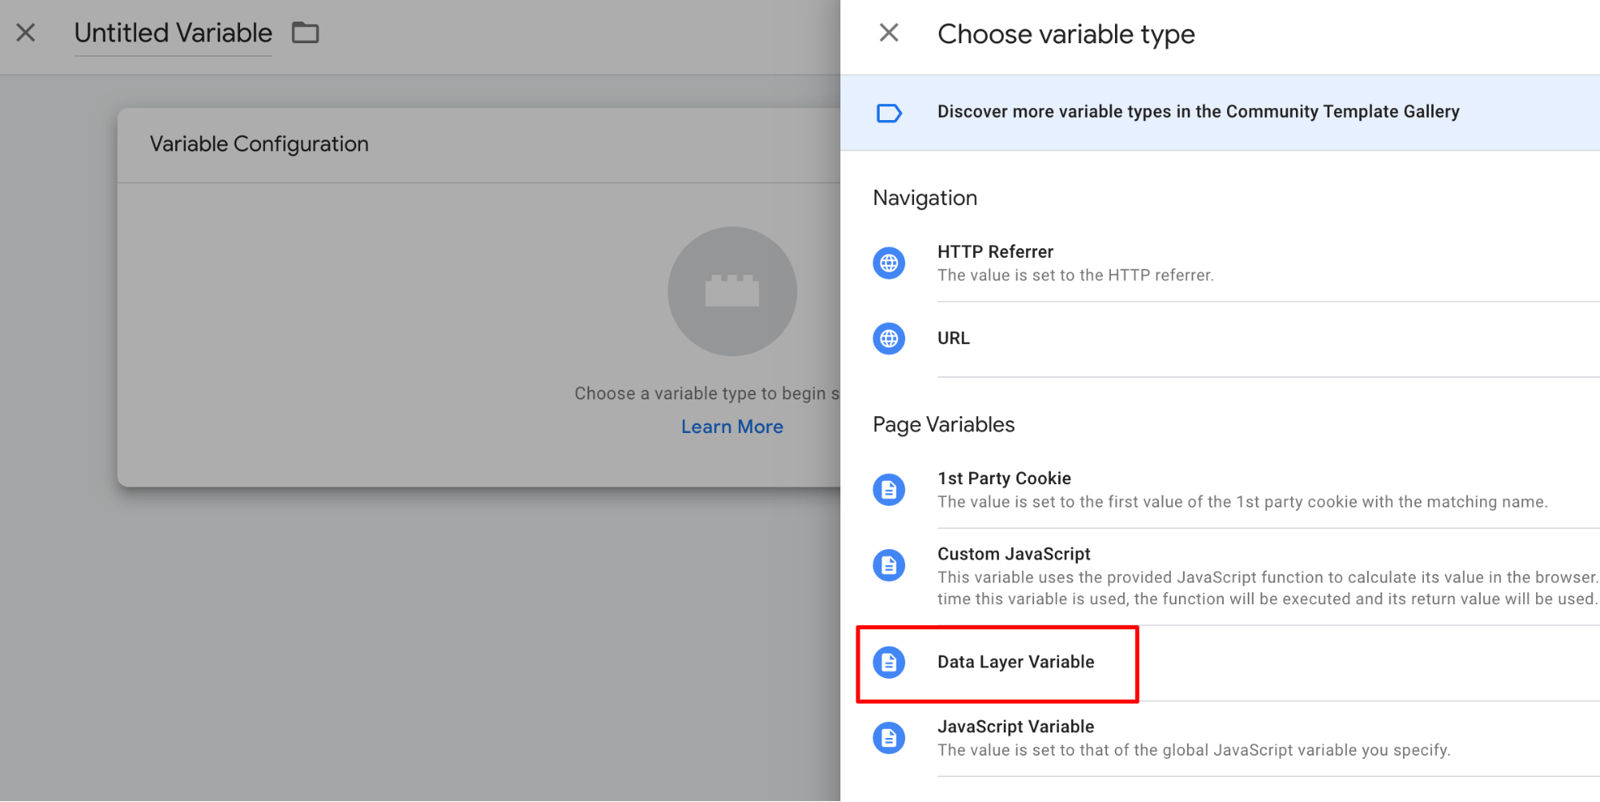
If you would rather avoid wrestling with source code and manage things yourself, this is the baseline you should know. Now we can move on to the implementation, which is the more fun part.
Event Assignment with GTM
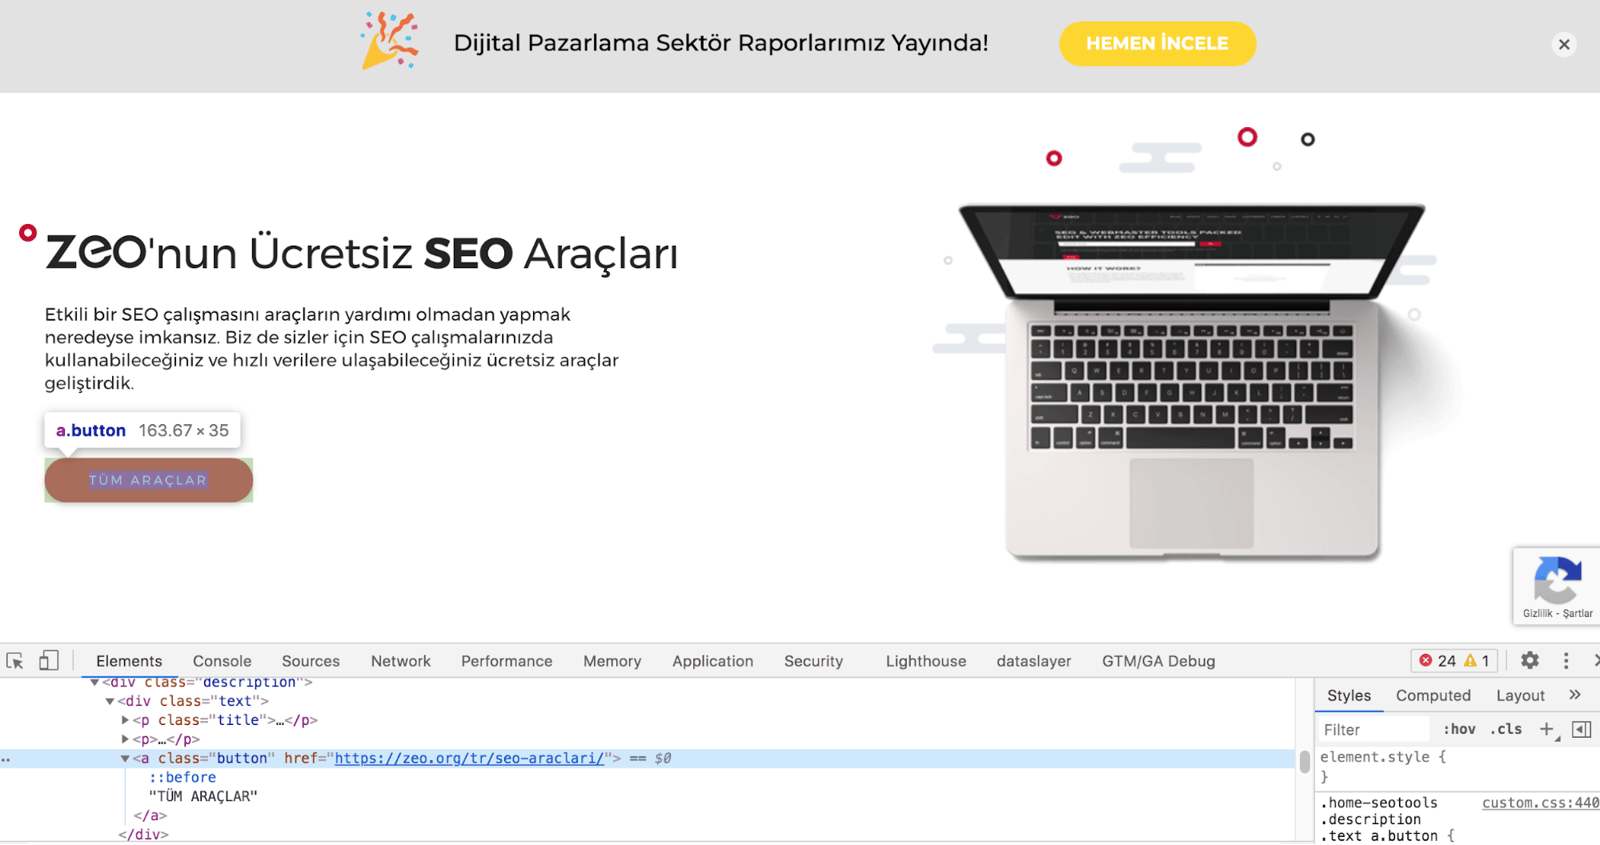
I want to measure the clicks on the All Tools button on the home page, where our free SEO tools live. That way we can easily reach the CTR data and gauge the button's performance from the click data of visitors landing on the home page. First, check whether the button already has a predefined event. The “Event tracking tracker” chrome plugin can help with this.
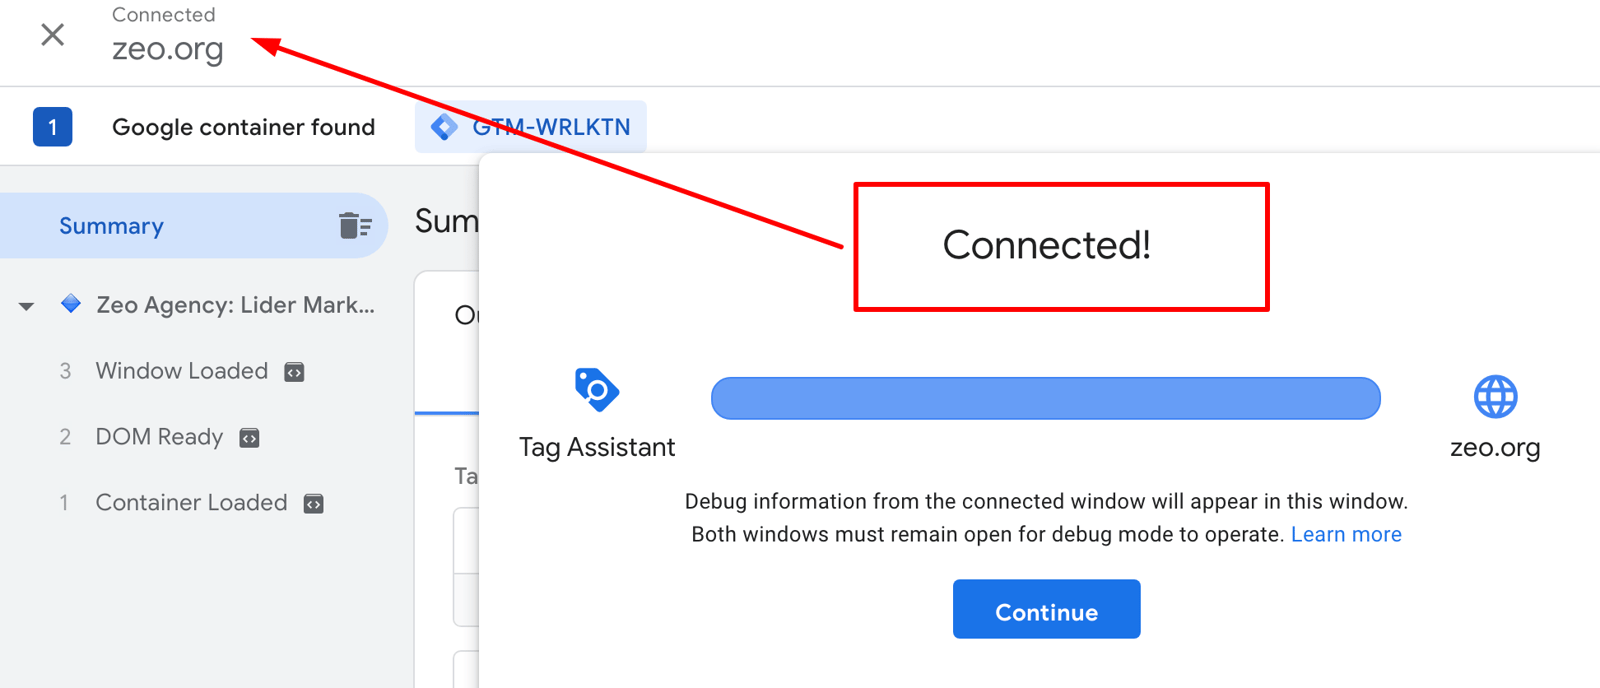
Once we log in to GTM, we run Google Tag Manager by clicking the preview button in the top right corner. From there, we connect to Google Tag Manager by entering the page's information in the URL field.
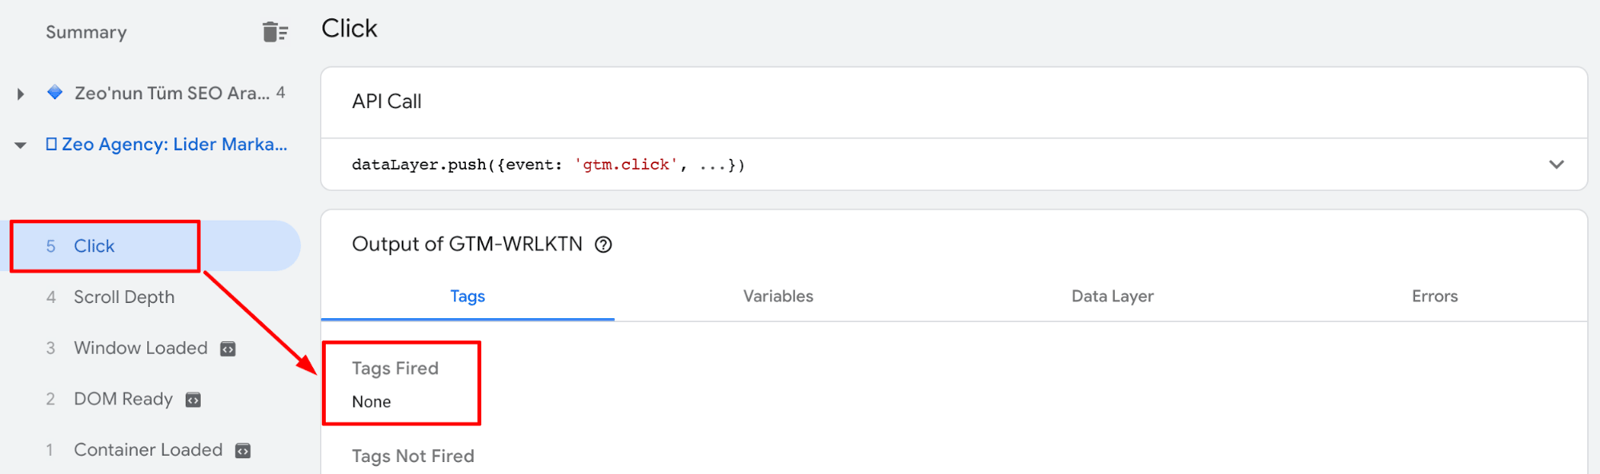
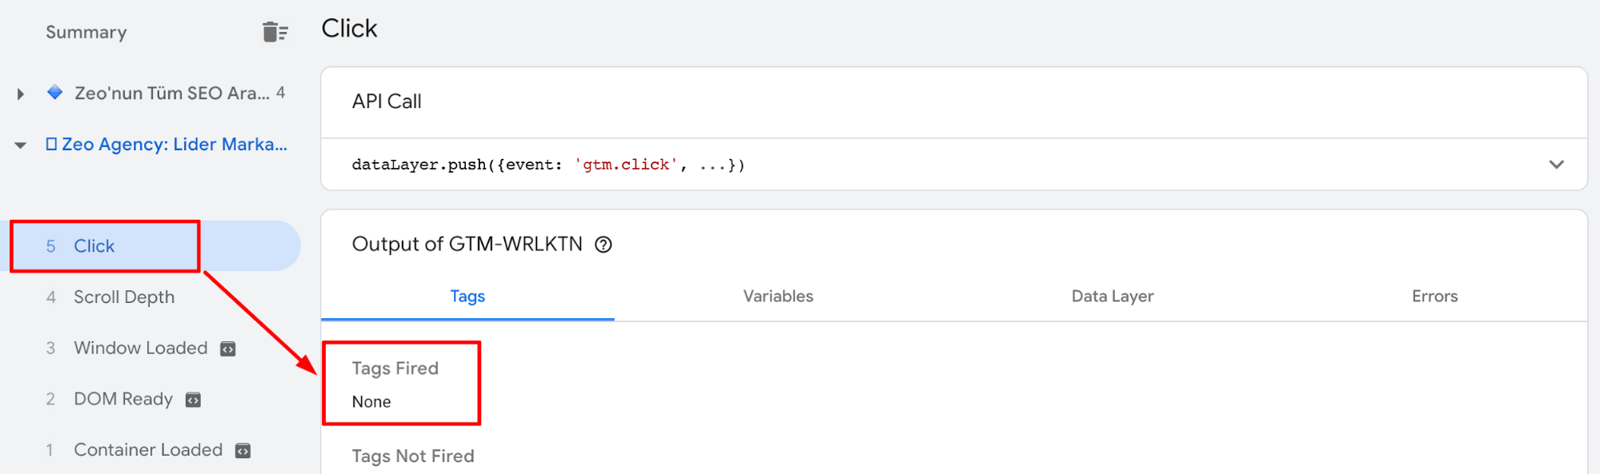
As the screenshot below shows, when I clicked the “all vehicles” button, no tag fired. Once we finish the event assignment in GTM, the named tag will fire.
On the page that opens, we now have access to information about every click. It presents variables for each button, form, or clicked element. With these variables, you can create definitions under the conditions you set.
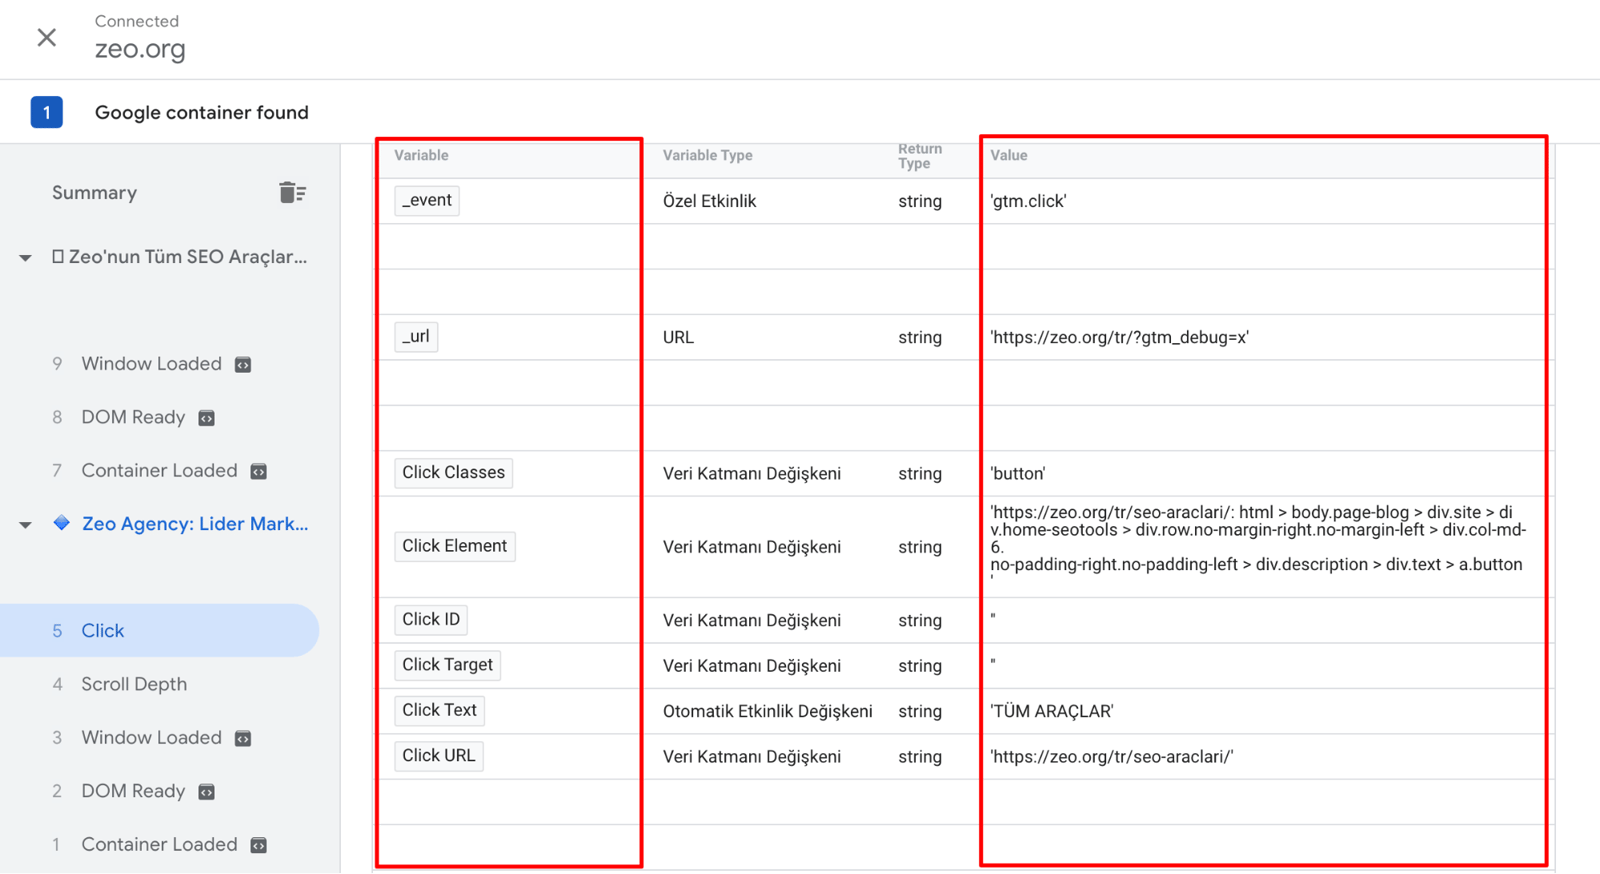
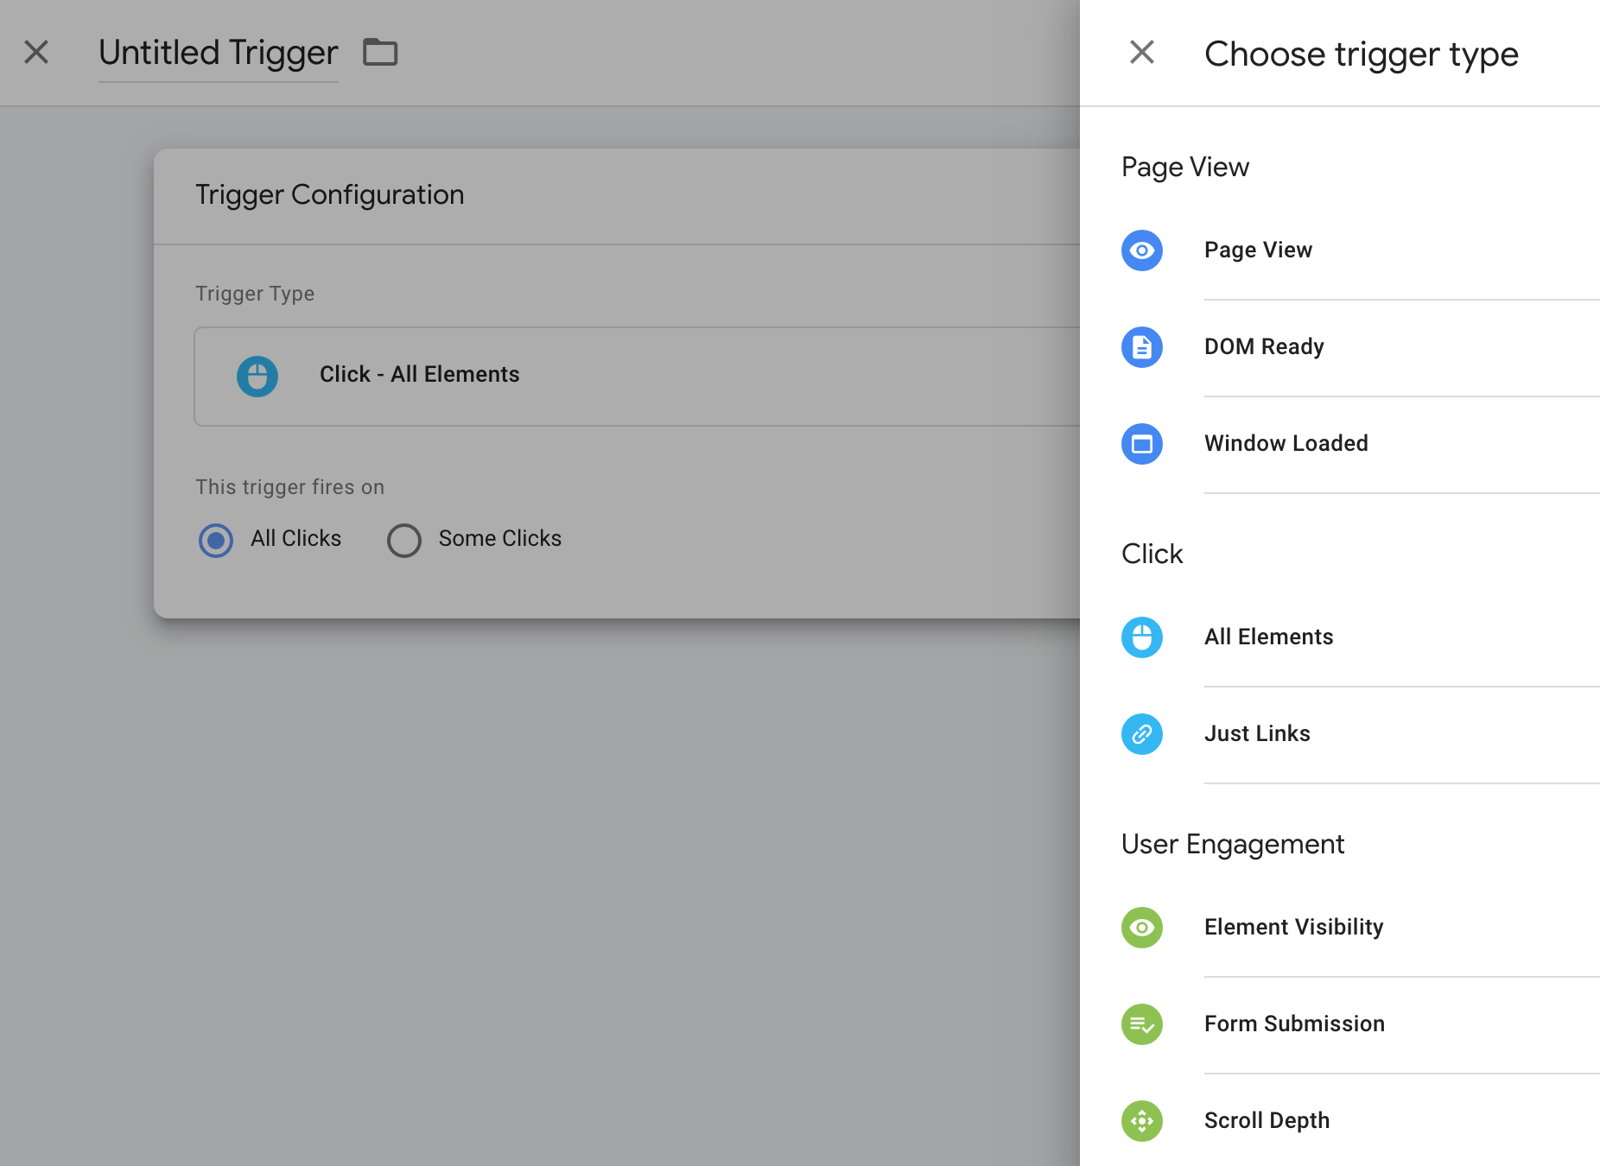
Using the variables from the button above, we will create a trigger. Head to the “triggers” section in the left panel of GTM, click the “new” button, and give the trigger a name. Click the trigger configuration to choose the trigger type. Since I am working with click data here, we click on click>all items.
This is how we set the conditions of the trigger that gives us the click data. When we build those conditions, we use the variables generated by the click I mentioned above. Each click can carry different variables, or it can present the same information. The variables depend entirely on how the software team built that part of the site.
Let's look at a few built-in variables you are likely to use here.
Page Path: Points to the path portion of the matching URL.
Page URL: Shows the address, that is the URL, of the relevant page.
Click Element: Reads the gtm.element key in the dataLayer that holds the data temporarily. This key contains the HTML element of the auto-event action. In other words, the variable references the matching element in the DOM at the moment of the click.
Click Classes: Reads the gtm.elementClasses key in the dataLayer that holds the data temporarily. It returns the string value of the “classes” property in the DOM at the moment of the click.
Click ID: Reads the gtm.elementId key in the dataLayer that holds the data temporarily. It returns the string value of the “id” property in the DOM at the moment of the click.
Click Target: Reads the gtm.elementTarget key in the dataLayer. This key sets the condition defined in Tag Manager.
Click URL: Reads the gtm.elementUrl key in the dataLayer. This key holds a value from the href or action attributes.
Click Text: Reads the gtm.elementText key in the dataLayer. This key presents the text attribute in the DOM.
You can also find details on built-in variables for Android containers here, along with the Google source for built-in variables for iOS containers here.
With that covered, we can configure the triggers. Knowing how your site is structured will help you pick the variables that result from a click. Because the rules you set here affect the whole site, you should not let one rule trigger more than one part. If it does, you will not get the most accurate data.
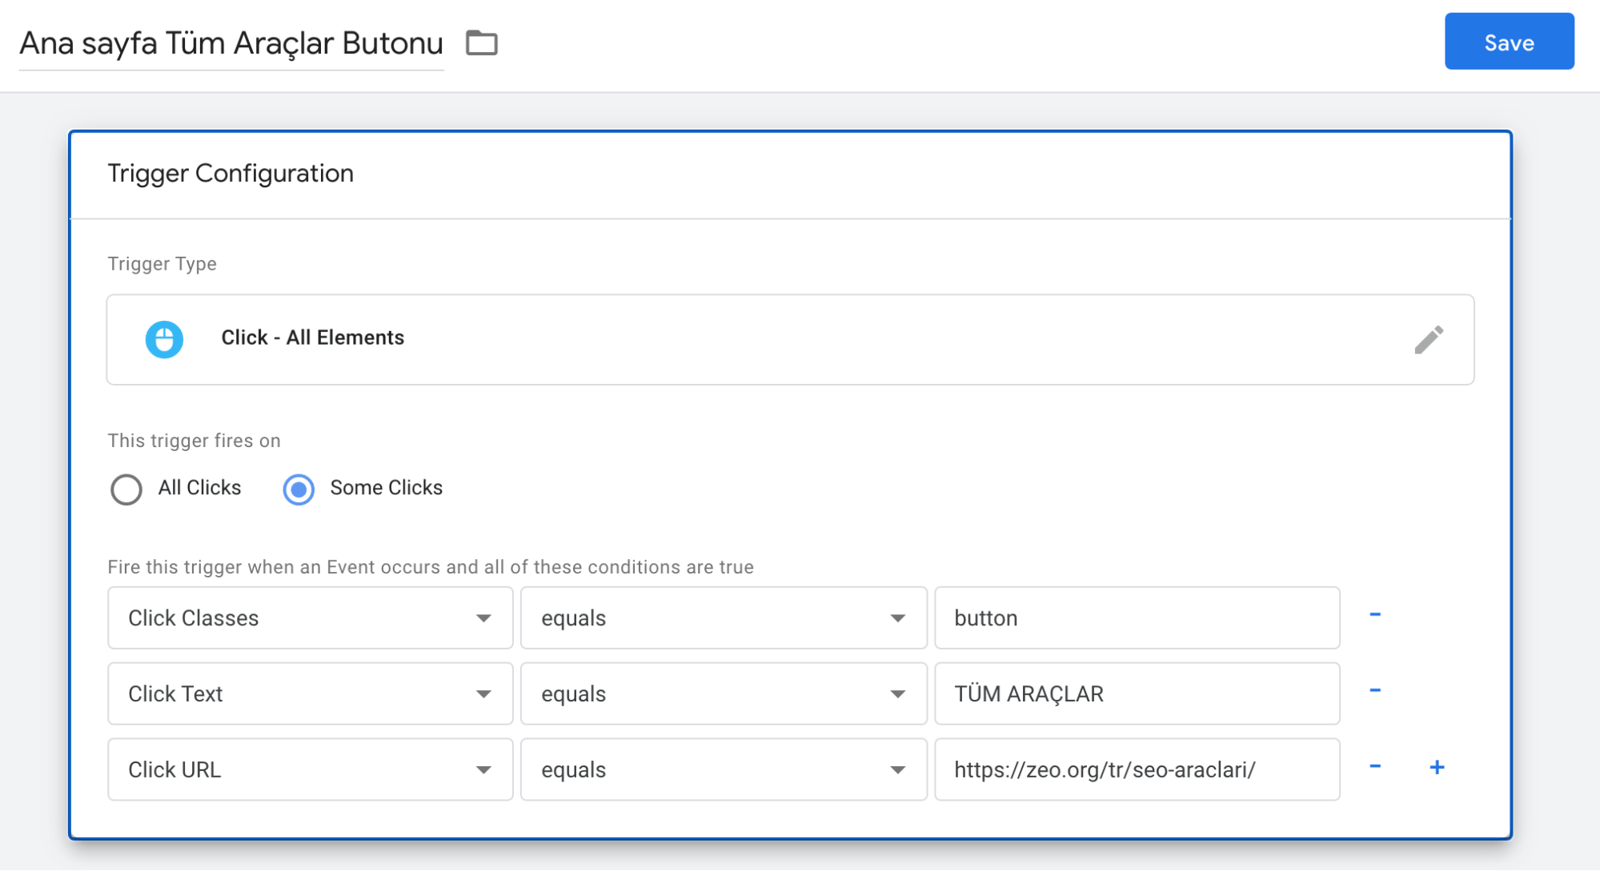
From the variables of the button above, I picked several that can be unique and built a rule. When you create rules, you get conditions such as starts with, ends with, is equal to, is not equal to, and does not end with. I tend to prefer equal to, begins with, and is not equal to. Keep in mind that the trigger only works when all of the conditions across the 3 different rules above are true.
Additional information: If you do not have a parser variable and cannot build a condition in the trigger, ask the software team to create a unique variable for you.
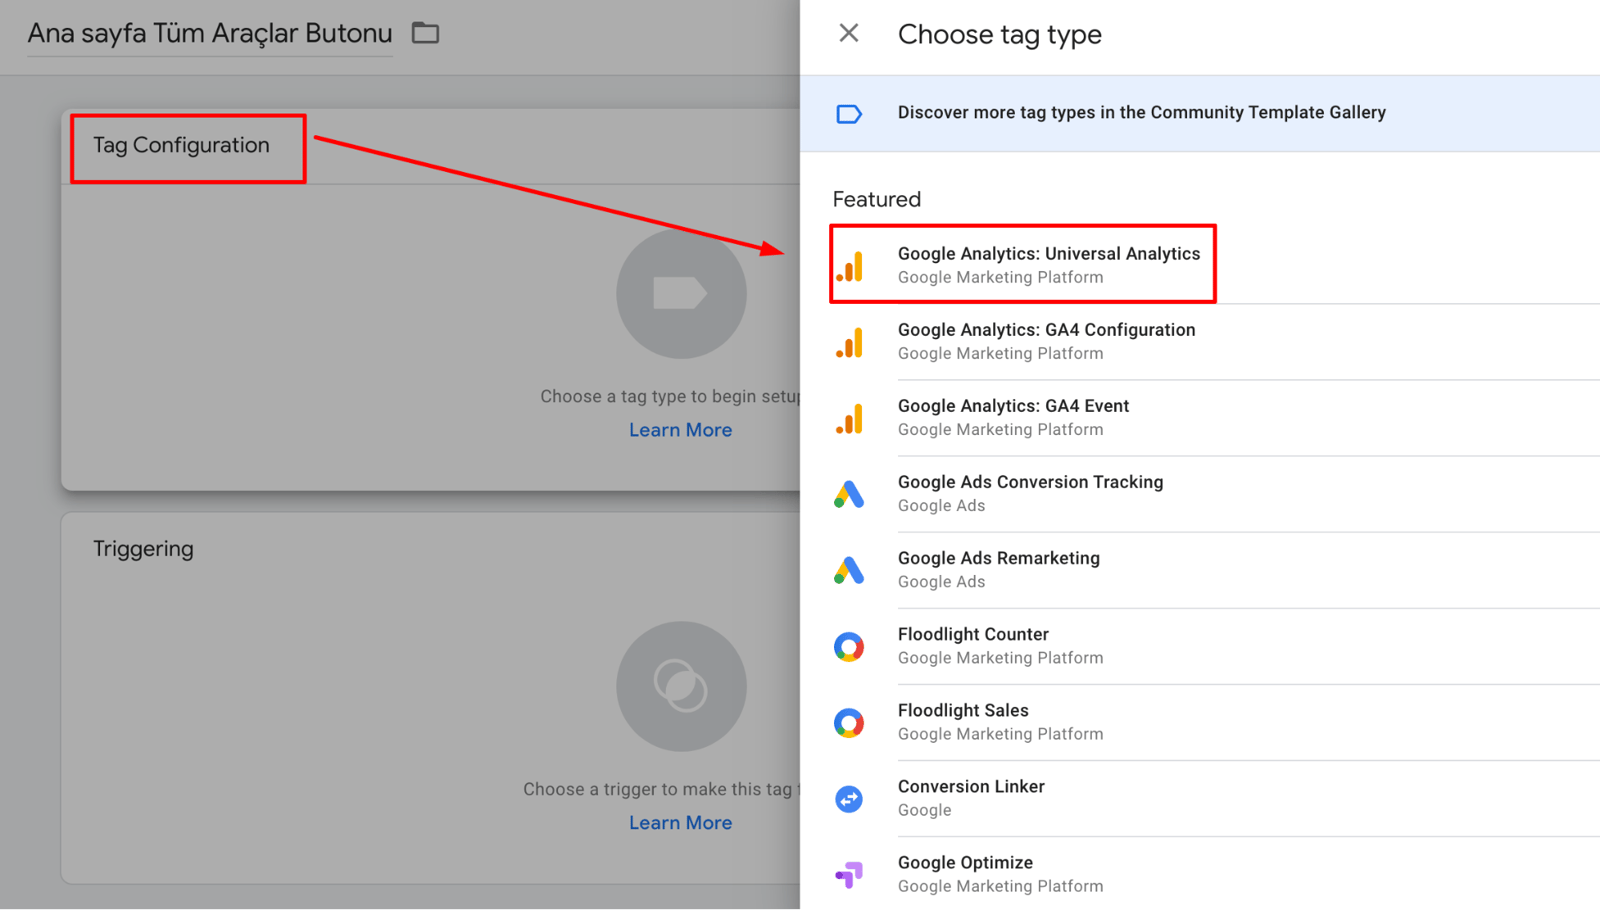
Save the trigger once you are sure it holds the correct conditions. Next, we will create a label and connect to Analytics. We build a tag to link the trigger we just created. Go to the “tags” section in the left panel of GTM, click the “new” button, and name the tag you are about to create. Click the tag configuration and select your Analytics type.
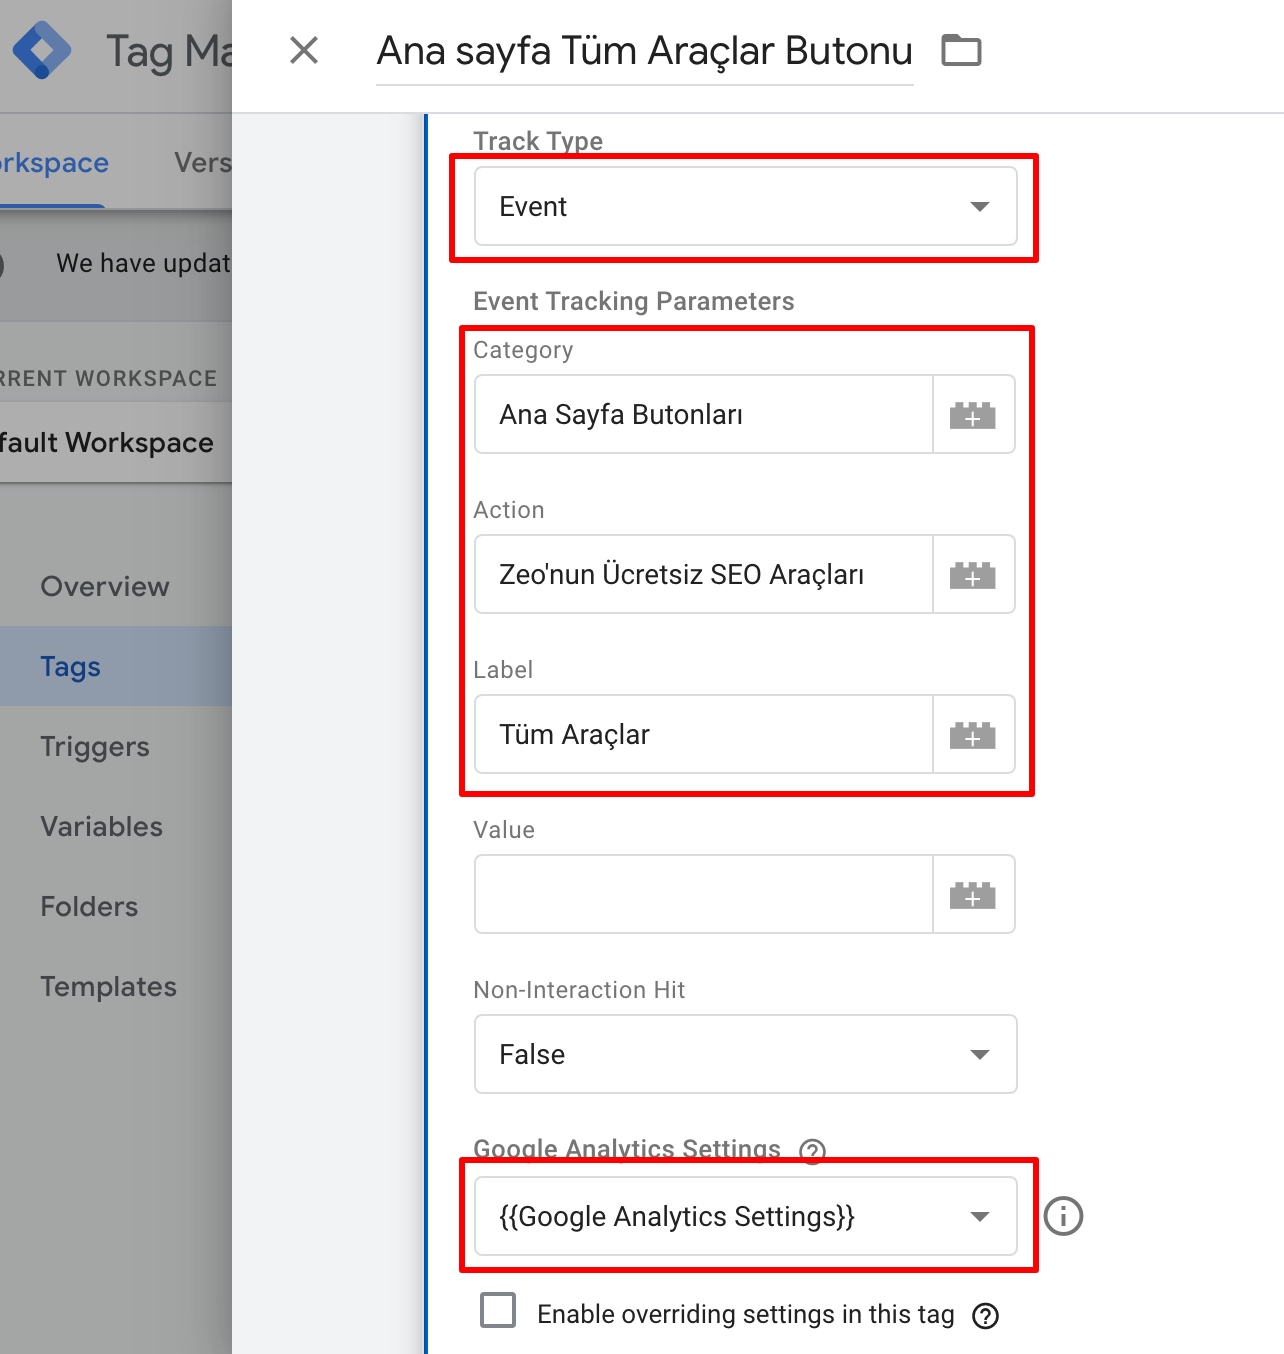
Add tracking parameters by choosing a tracking type for your tag. Since we are creating an event, we select the tracking type and connect the right account from the Google Analytics settings section by filling in the category, transaction, and tag information.
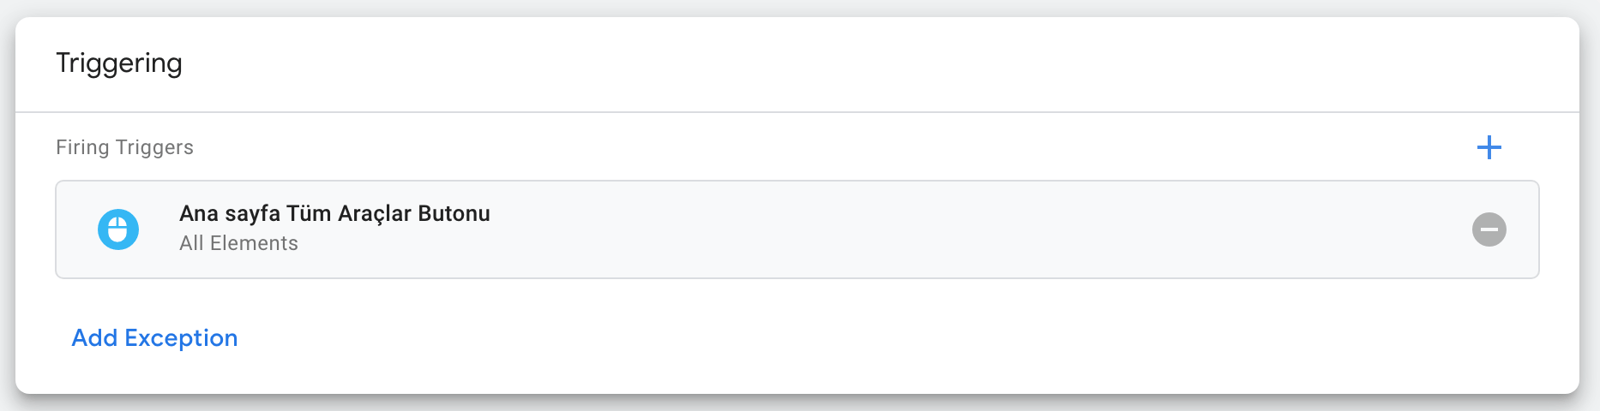
After configuring the event, we connect the trigger we created to this tag. I click the trigger section, select the trigger I made, and then save the tag.
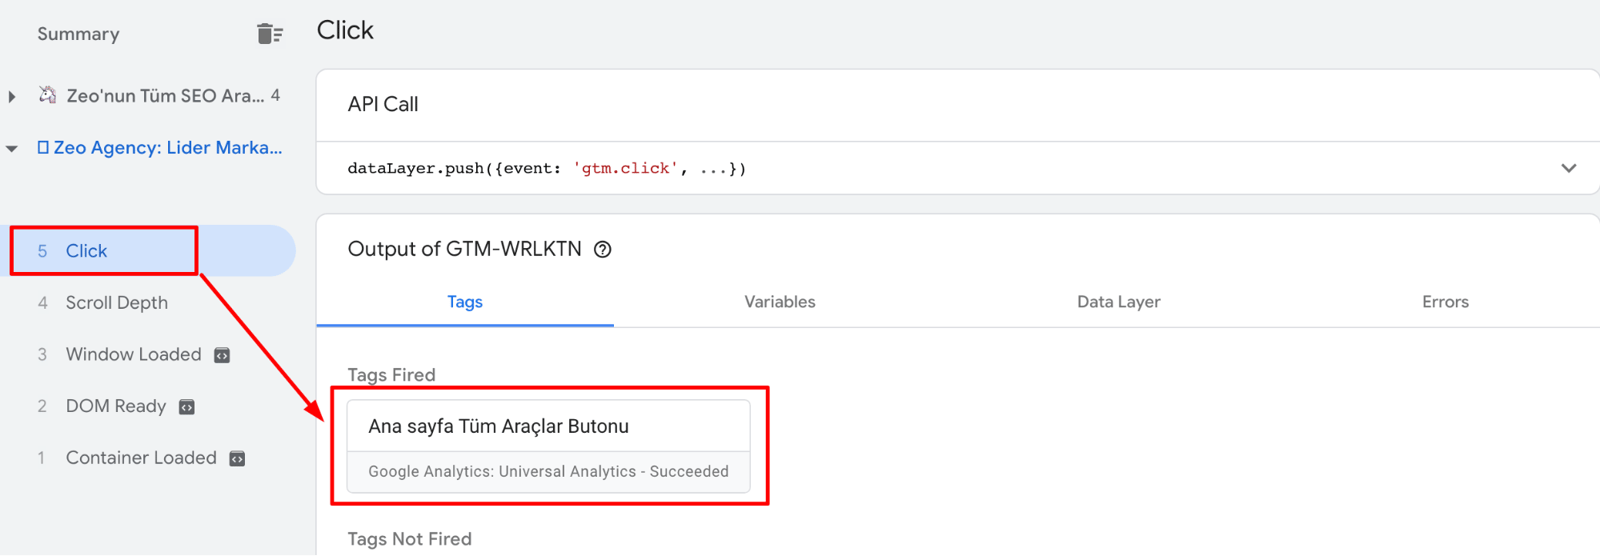
With the trigger and tag in place, we check that everything works from the preview section in Google Tag Manager. As the screenshot below shows, the tag fired when we clicked the “all tools” button.
Do not worry if you feel you did everything right and the tag still is not firing. GTM gives you a small but effective way out. You can inspect the error by clicking the tag you created in the “tag not fired” section under the triggered tags.
To show this section, I made the conditions of my tag faulty and clicked the tag as described above. The area marked in red below lists the conditions that affect the tag's firing, meaning the conditions that returned an error. This way, GTM surfaces error details that our own checks would miss. With this feature, we can adjust the conditions in the trigger and get the event running smoothly.
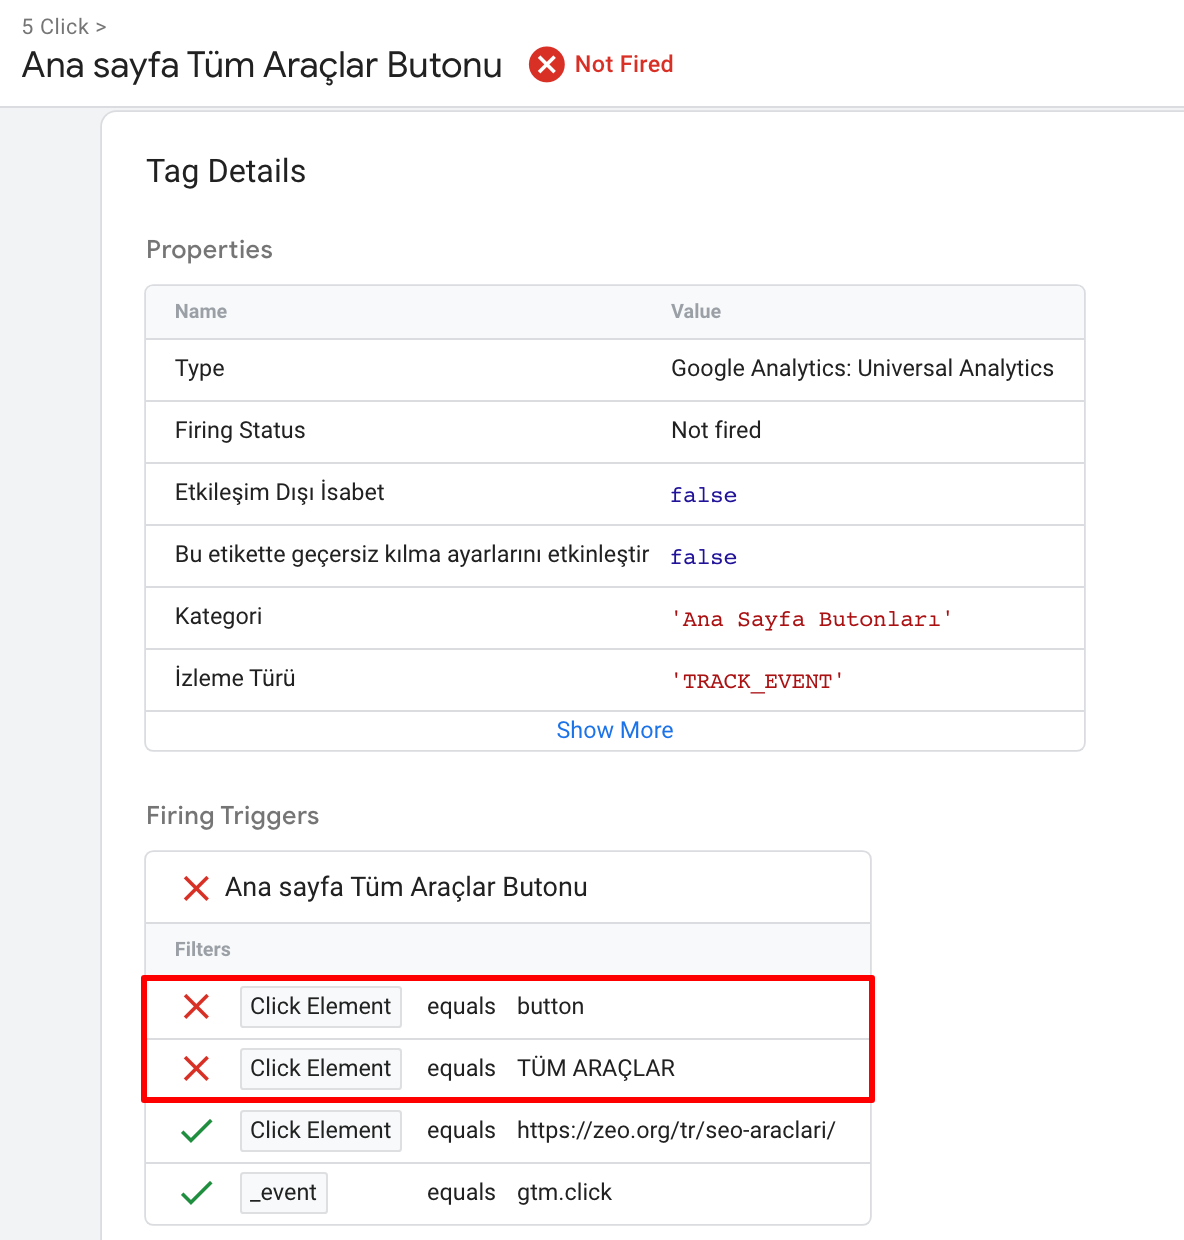
If your tag is firing without issues, it is time to make it live. Click the “submit” button in the top right corner, then add the version name and version description. Before long, the tag and triggers go live and data starts flowing to Analytics. You can reach this data, along with the click data after the event assignment, in the “behavior>events>most popular events” section of Analytics. To access the click data, make sure the date range is set correctly. For meaningful results, compare the number of sessions on the page that holds the button with the button's click data over the same date range.
In summary,
With Google Tag Manager, you can follow visitor movements and analyze user behavior while keeping software work to a minimum. That lets you measure how a given section functions and what it contributes.
By using the components in the GTM panel well, you can pass data to the next page through the data layer, and you can create definitions with JavaScript functions.
By pairing GTM and Analytics, you can track clicks by defining events in GTM and follow the whole process through a funnel setup in Analytics. At the same time, Google Analytics shows you which channel brought the click data to that section.
There is a lot of ground and plenty of use cases in the world of Google Tag Manager, and I wrote this article to give you, our valued readers, a solid starting point and to explain GTM from an SEO expert's point of view. I hope it helped. If you have anything to add or ask, drop it in the comments.
See you in another article :)
Resources:
https://marketingplatform.google.com/about/tag-manager/
https://marketingplatform.google.com/about/tag-manager/benefits/
https://support.google.com/tagmanager/answer/7182738?hl=en&ref_topic=7182737
https://www.simoahava.com/analytics/variable-guide-google-tag-manager/


