


In this article, we will be discussing how to make the crawl reports we generate with Screaming Frog more understandable and traceable.
To do this, we will use three main tools: Screaming Frog, Google Sheets, and Google Looker Studio.
Screaming Frog is an SEO tool that has improved a great deal in recent years. Here, we will use Screaming Frog to connect a planned crawl to our Google Drive account and then use a Looker Studio template to view the crawl reports on a single screen.
We do this so we can clearly track the changes on sites where we do intensive technical work from time to time, and so we can provide more meaningful data in client reports.
Crawl Scheduling
Looker Studio compatible export is only possible with the automatic crawl scheduling tool in the File>Scheduling section of the top menu.
To do this, we need to click on the "Add" tab in the image.
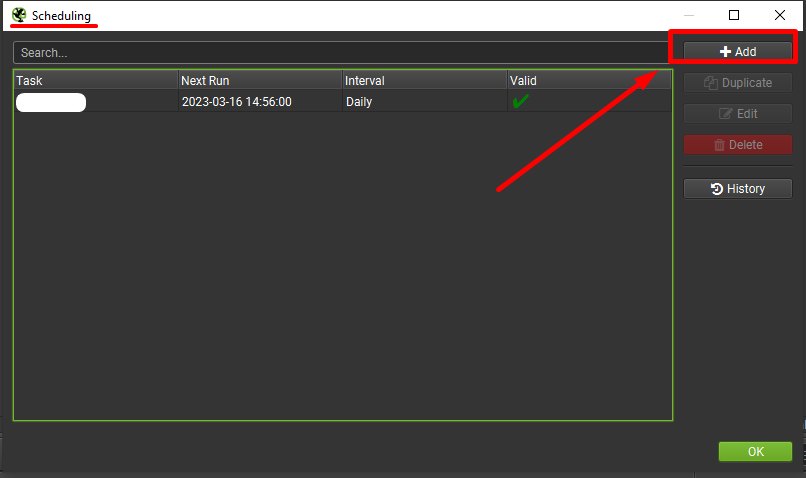
Note: If you want to do this for multiple domains, you can do it faster with the "Duplicate" tab after completing the configuration.
It is important to remember to update the source URL address here.
Creating Basic Configuration Settings
After the first process, you will see a screen as you can see below.
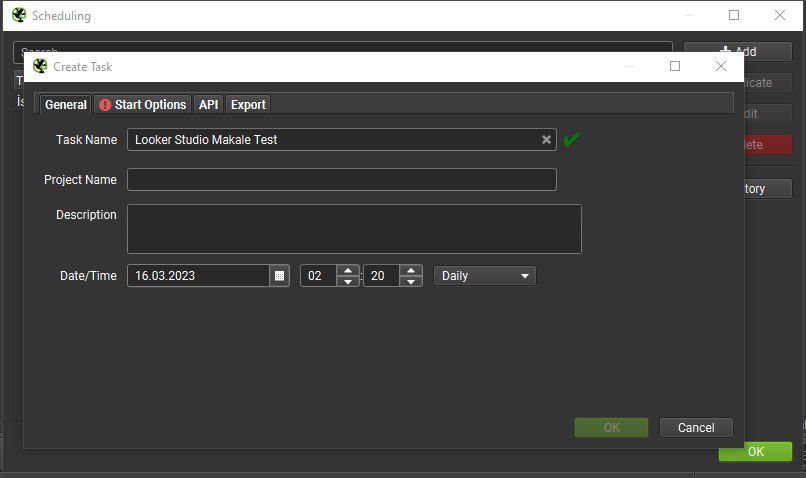
Here you need to fill in the relevant fields as you like. It's a good idea to give the timer a unique Task Name here, and I would recommend specifying a Project Name too so you do not confuse it with similar work.
In addition, you need to decide when the scan will first run and at what interval after that.
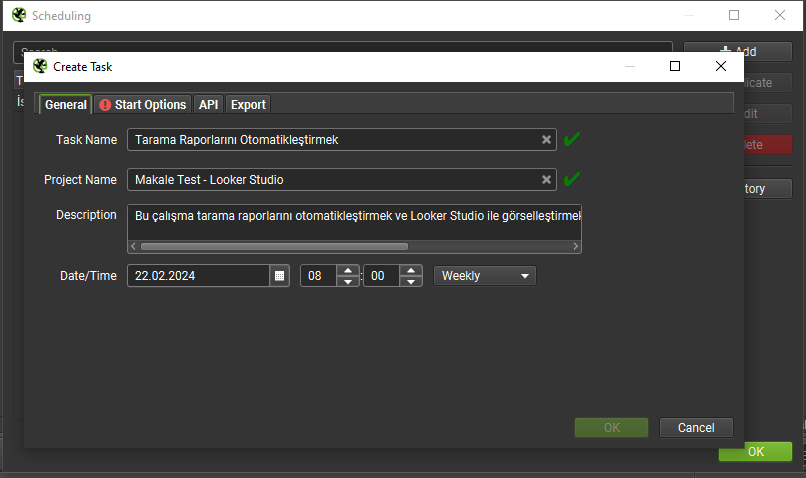
Setting Initial Settings
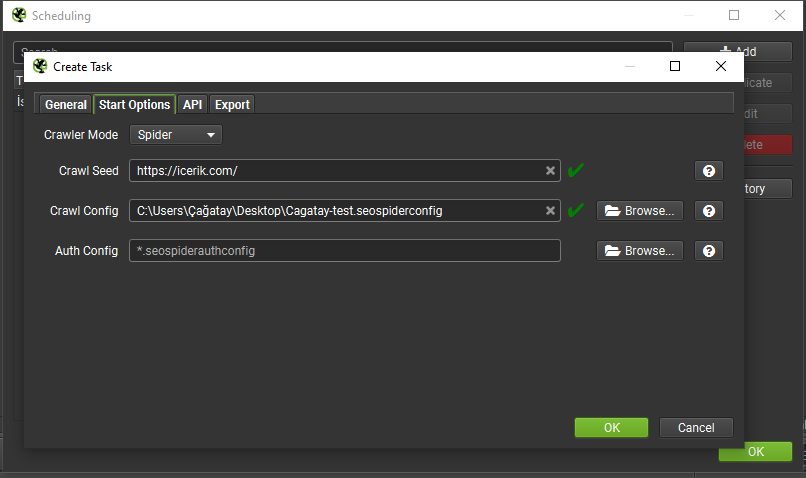
After taking care of the basic configurations, you need to configure the startup settings by clicking on the "Start Options" section on the side tab.
Here the tool actually offers us two different options: scanning via Spider or scanning via List Mode.
I prefer to proceed via Spider and enter my information quickly.
Here in the Crawl Config field, if we have previously created a configuration related to Spider, we can add it.
For example, I created and saved a configuration file for this project, which I will use here. The purpose of this file is to run the crawl according to the settings and properties it contains.
You can find detailed information about this topic here.
It is worth mentioning that I have activated the Pagespeed API tab in the API section.
Configuring Export Settings
For Looker Studio compatible exports to run smoothly, we need to use Headless Mode, so make sure to enable this feature.
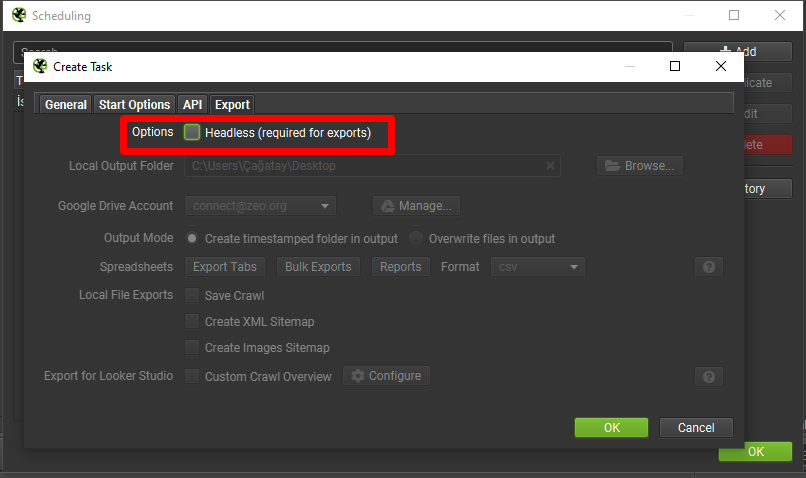
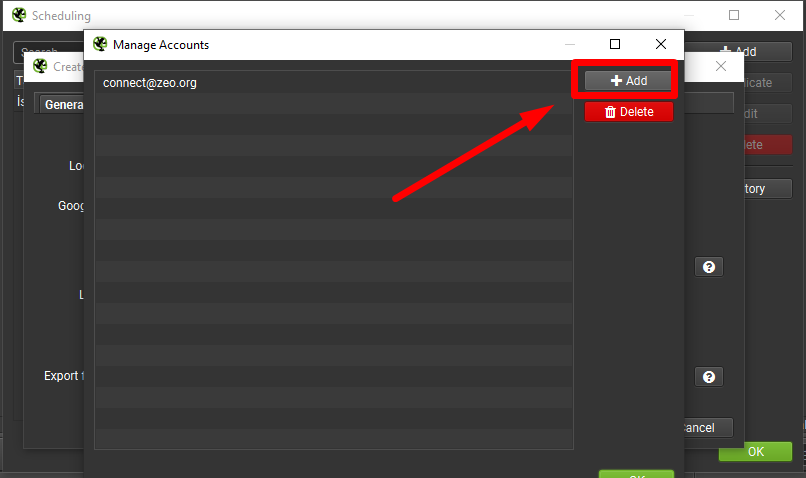
After this process, I add the Google Account by clicking the Manage tab from the Google Drive Account section.
Then I complete the binding process by defining some permissions as shown below.
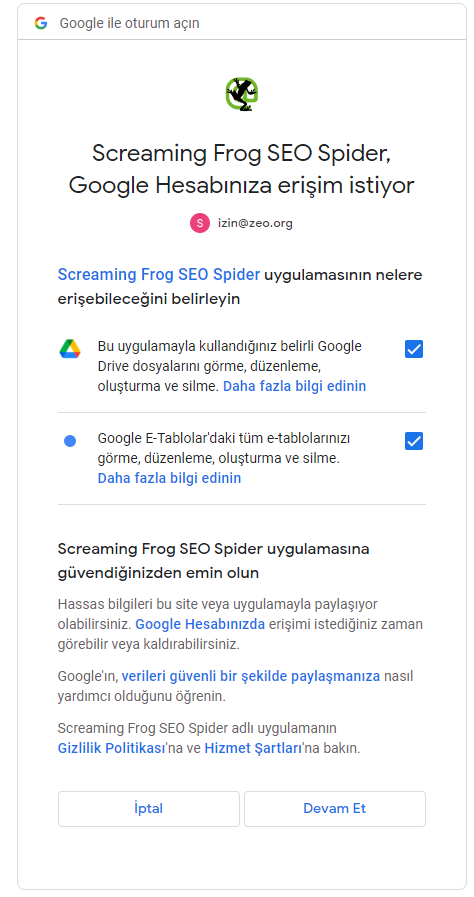
After completing the SEO Spider authorization, I edit my settings as follows.
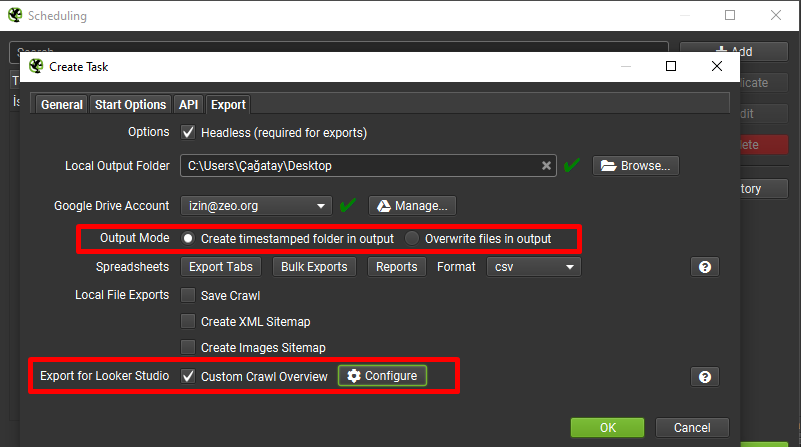
After selecting the custom scan overview report, I configure which data I want to export in the Configure section.
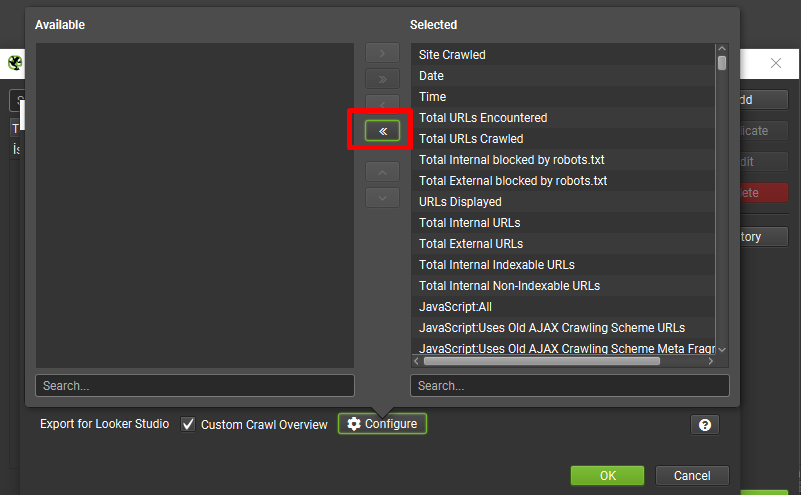
Since I wanted to export all the fields here, I clicked on the >> tab to quickly complete this part.
After making all the adjustments, clicking OK kicks off a scan, as you can see below.
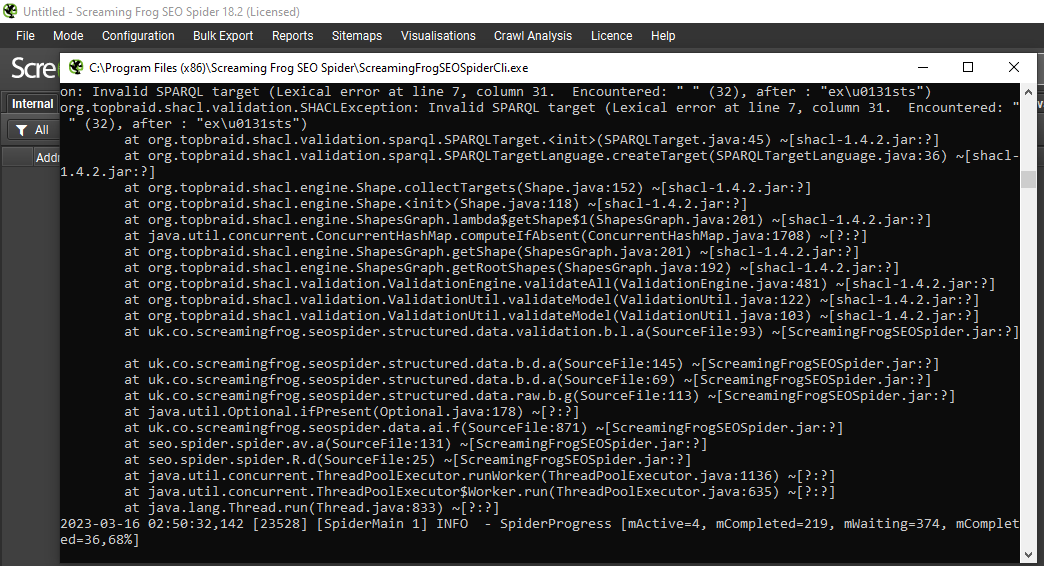
Next, we need to check the Google Drive account we integrated.
There, we can see that our file is located here:

As you can see below, it has been exported in a single line.
This file gets overwritten each time a weekly scan runs.

Connecting to Google Looker Studio
At this point, we have technically completed a large part of the work.
From here, you can either build your own Looker Studio report from scratch, or create a copy of the report we have built here and select your own data.
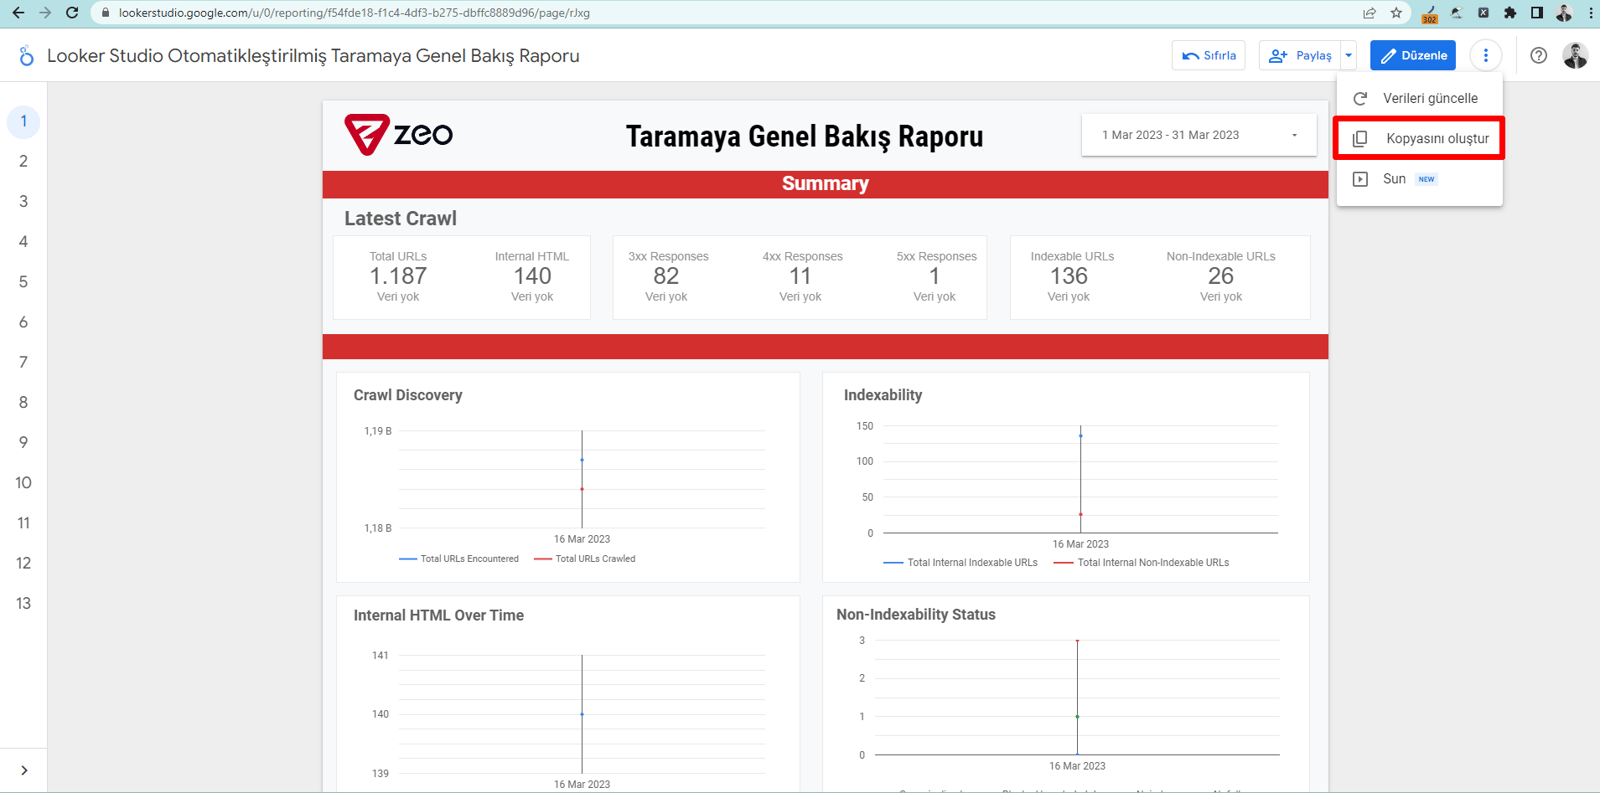
To copy the report, just click on the three dots at the top right and then click on the Create Copy tab.
Next, as you can see below, we need to select our own file as the data source from the available data sources.
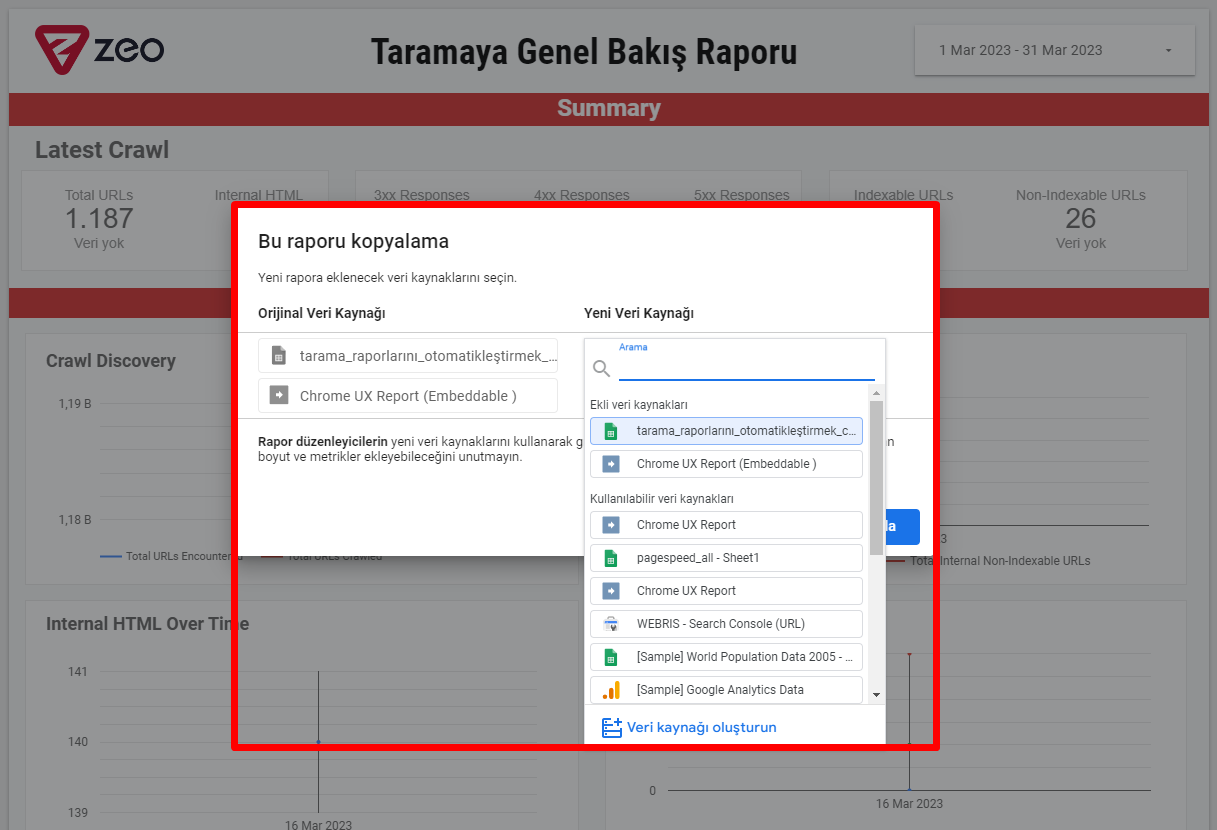
To select a new data source, follow these steps to pick the spreadsheet.
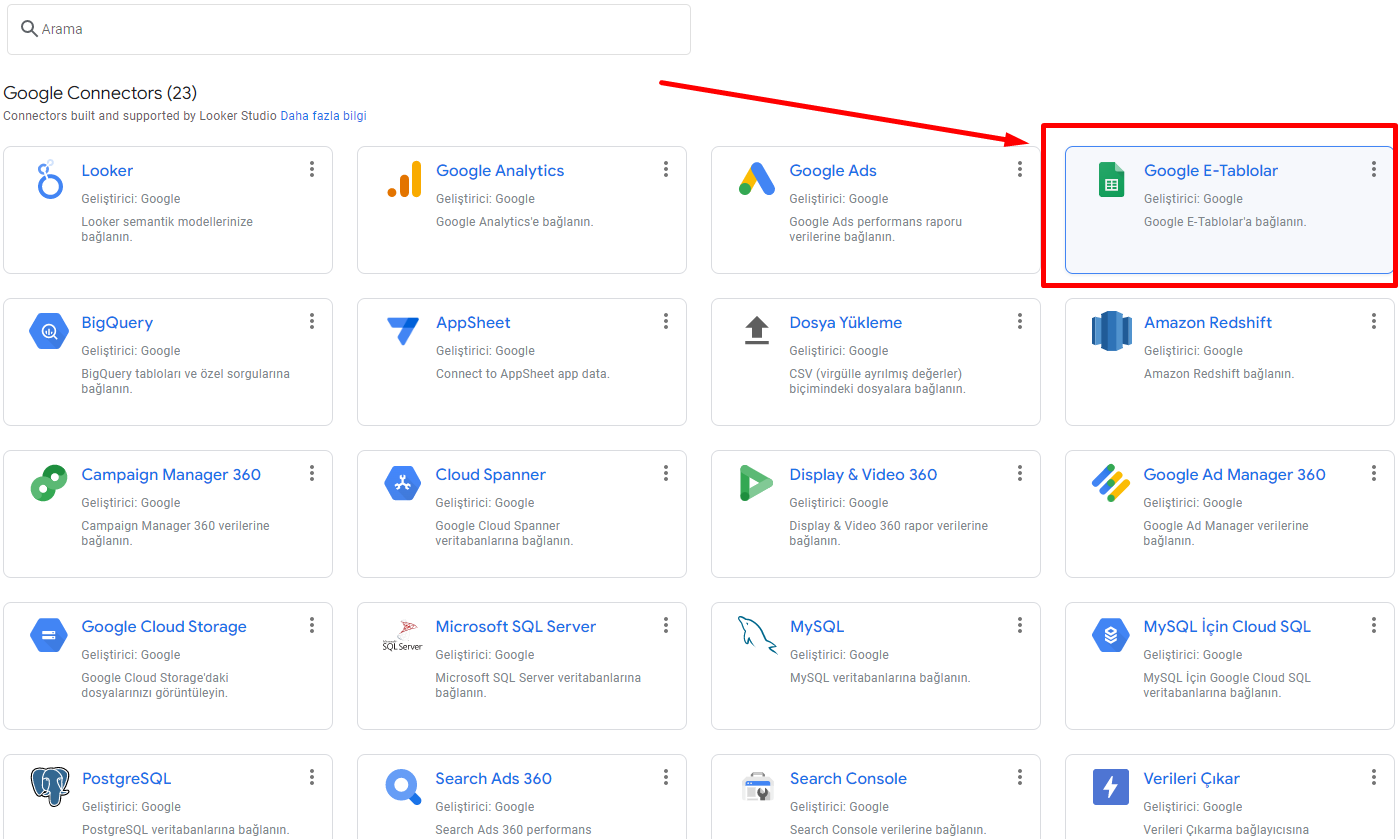
After selecting Google Sheets as the new data source, you need to follow the steps below.
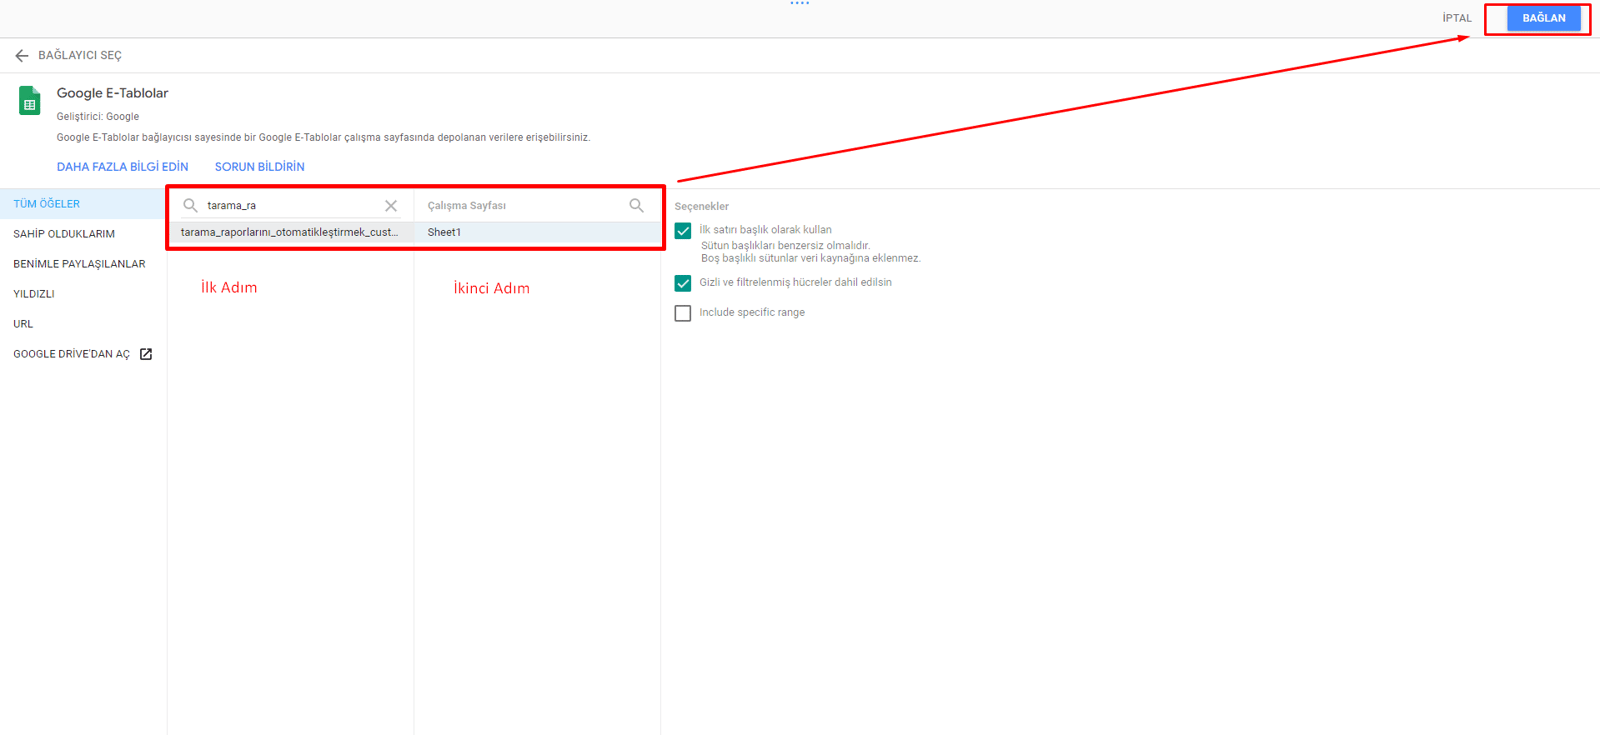
After clicking the Connect tab, the screen below will appear. Here we complete the process by adding it to the report.
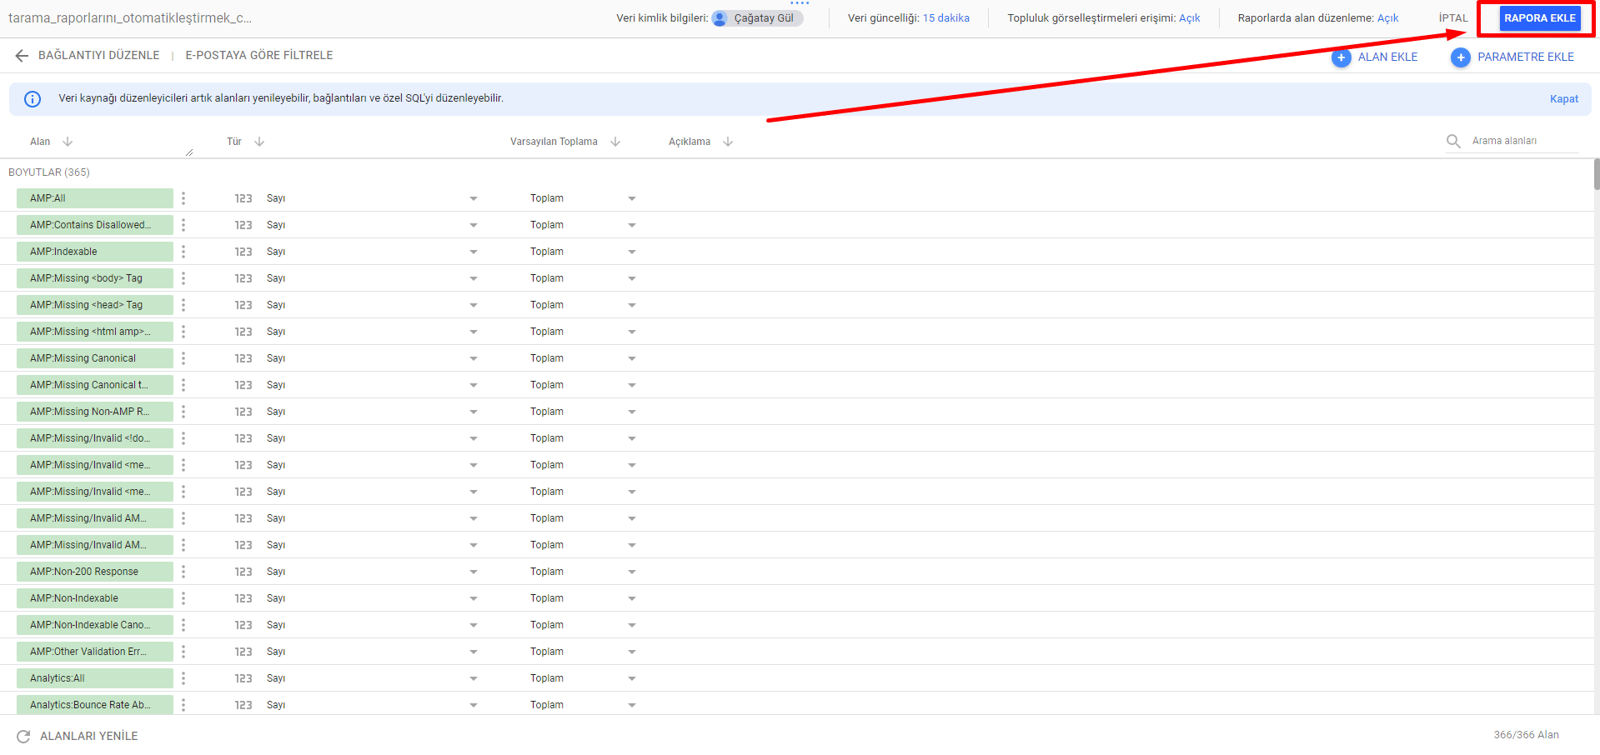
Here you may get an error in some parts after adding to the report, or sometimes Looker Studio may see some fields as date type instead of number. You can edit these parts manually.
After clicking Add to report, you complete the process by clicking "Copy Report" as you can see in the section below.
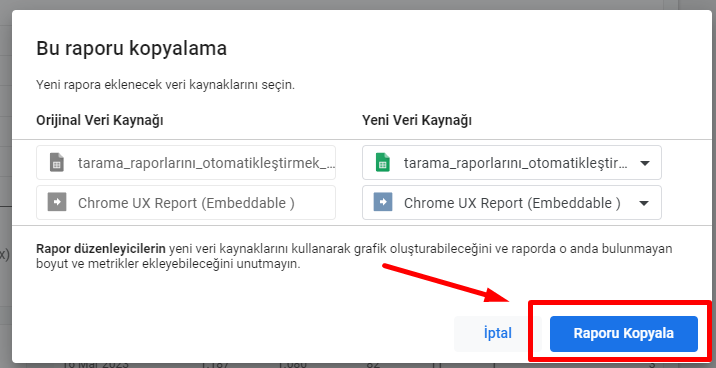
Once you have copied the report, it will be updated the same way every time our automatic scan runs, and you will be able to analyze the data graphically in more detail on a weekly basis.
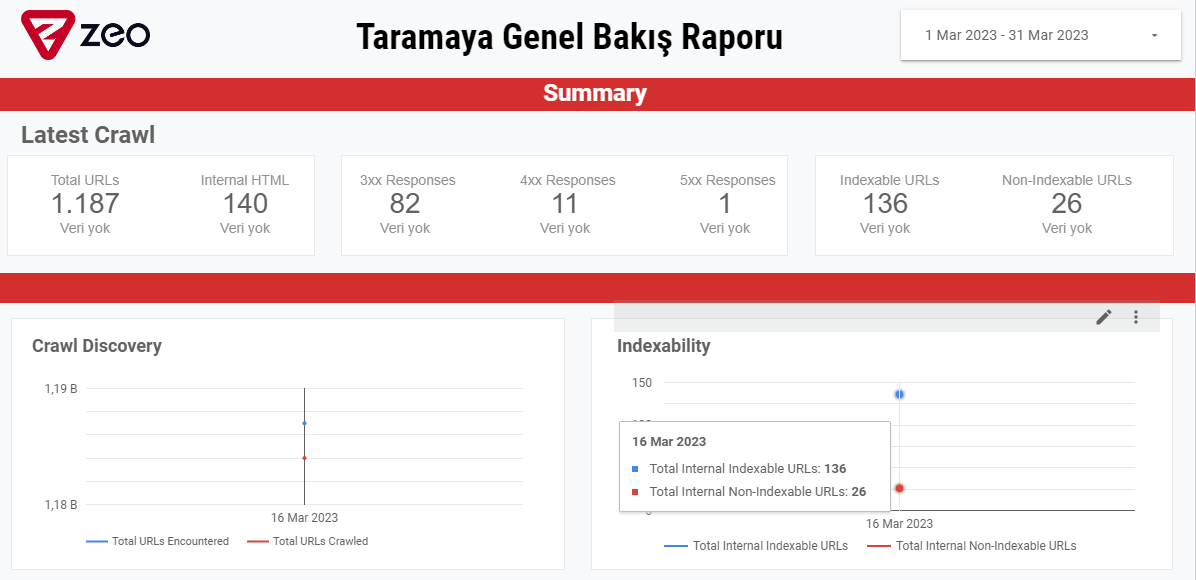
This template, created as an example, includes elements related to general site health, and we plan to keep expanding it over time.
Here are the images from our report:
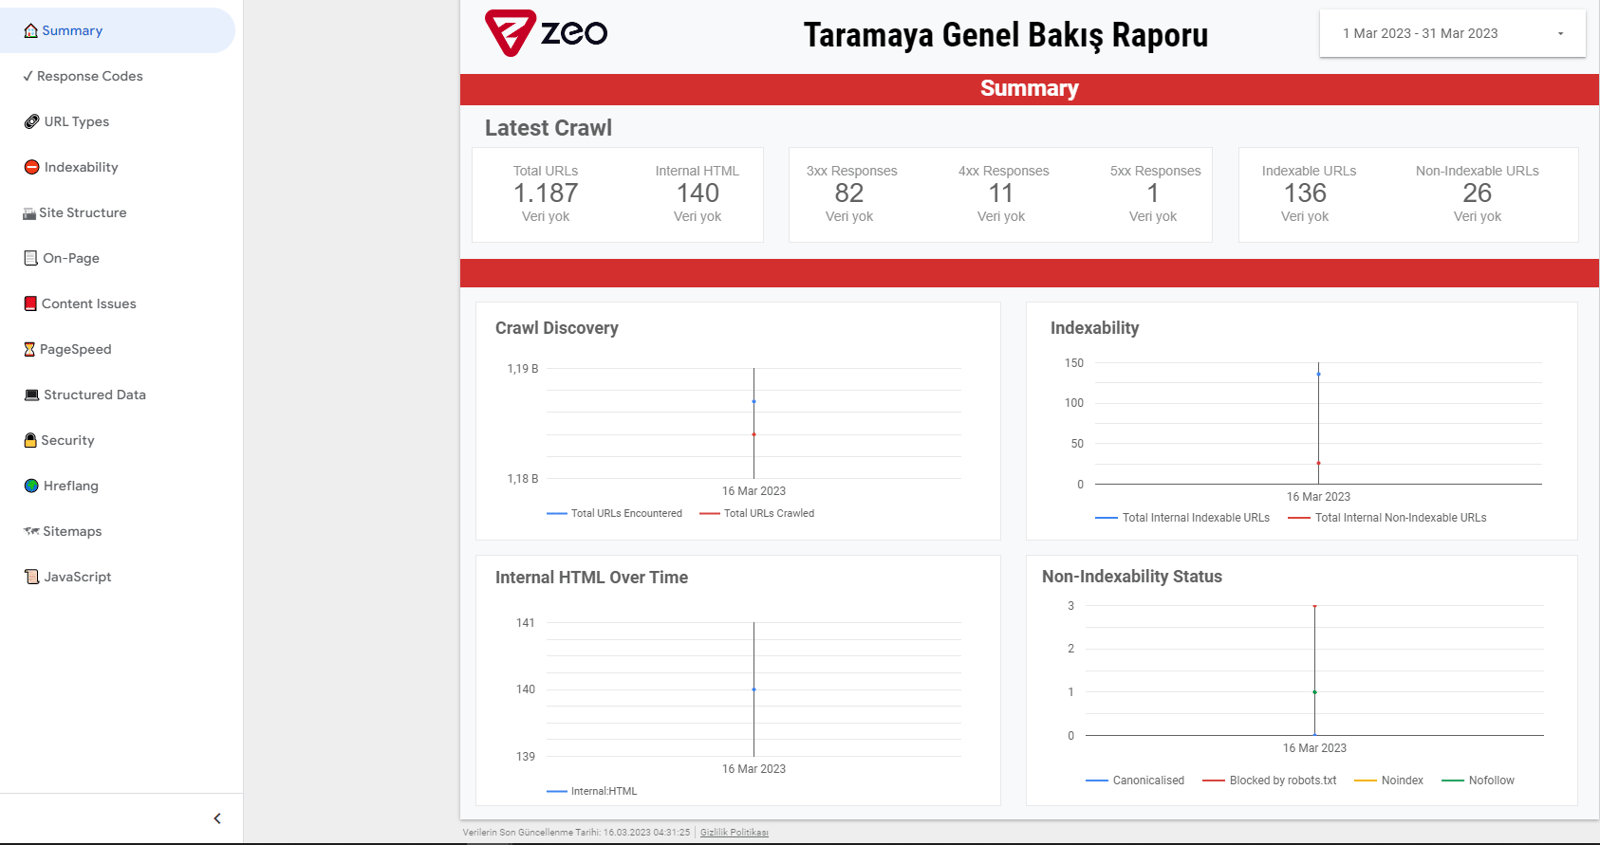
Genel Bakış
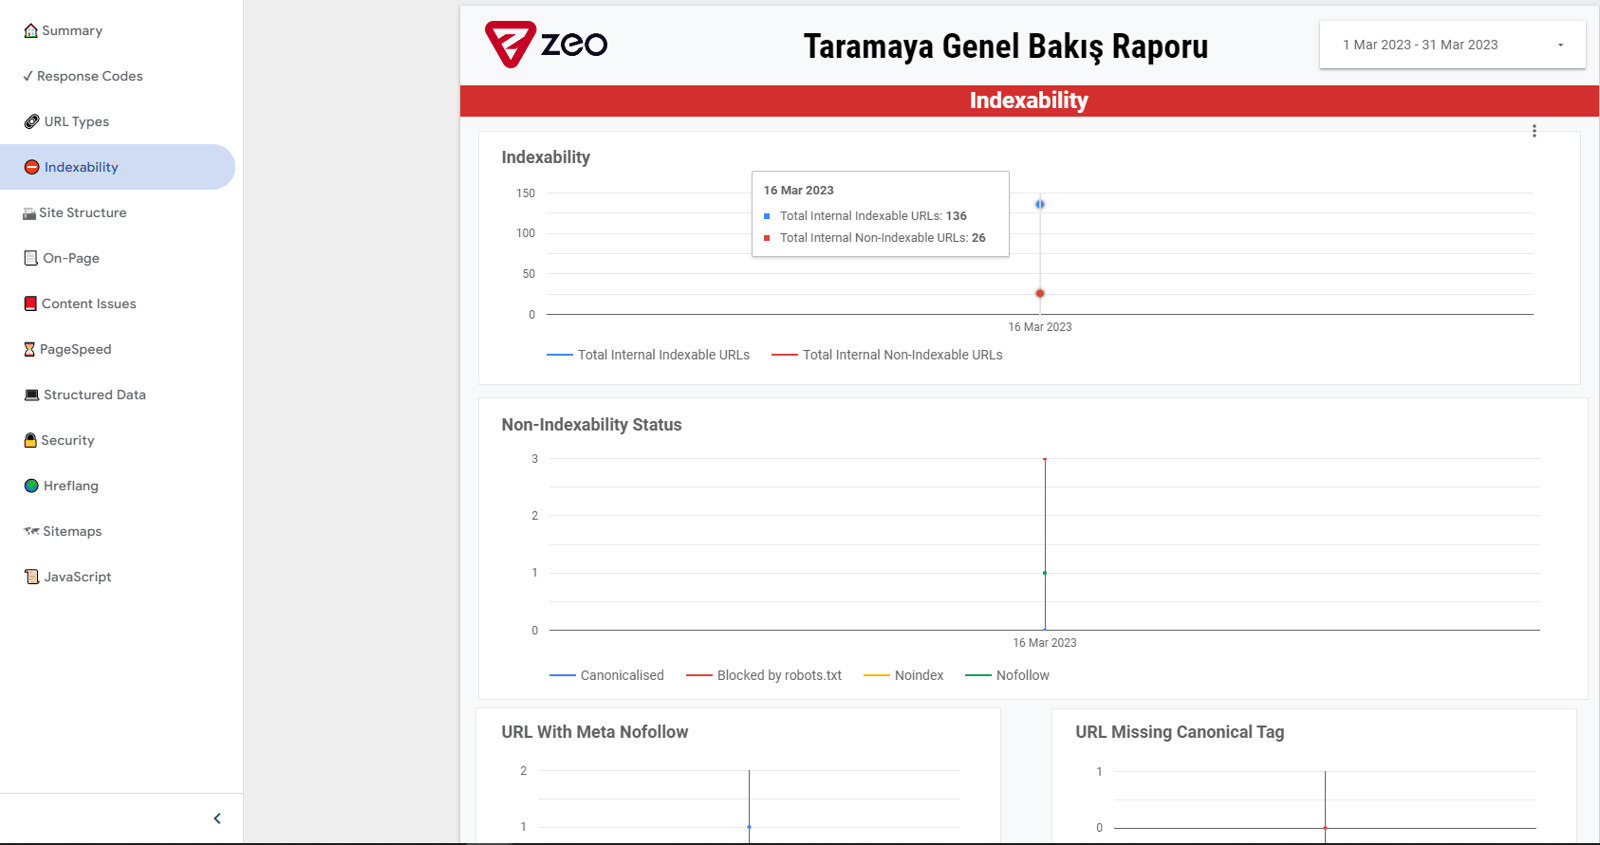
Indexability
On-Page
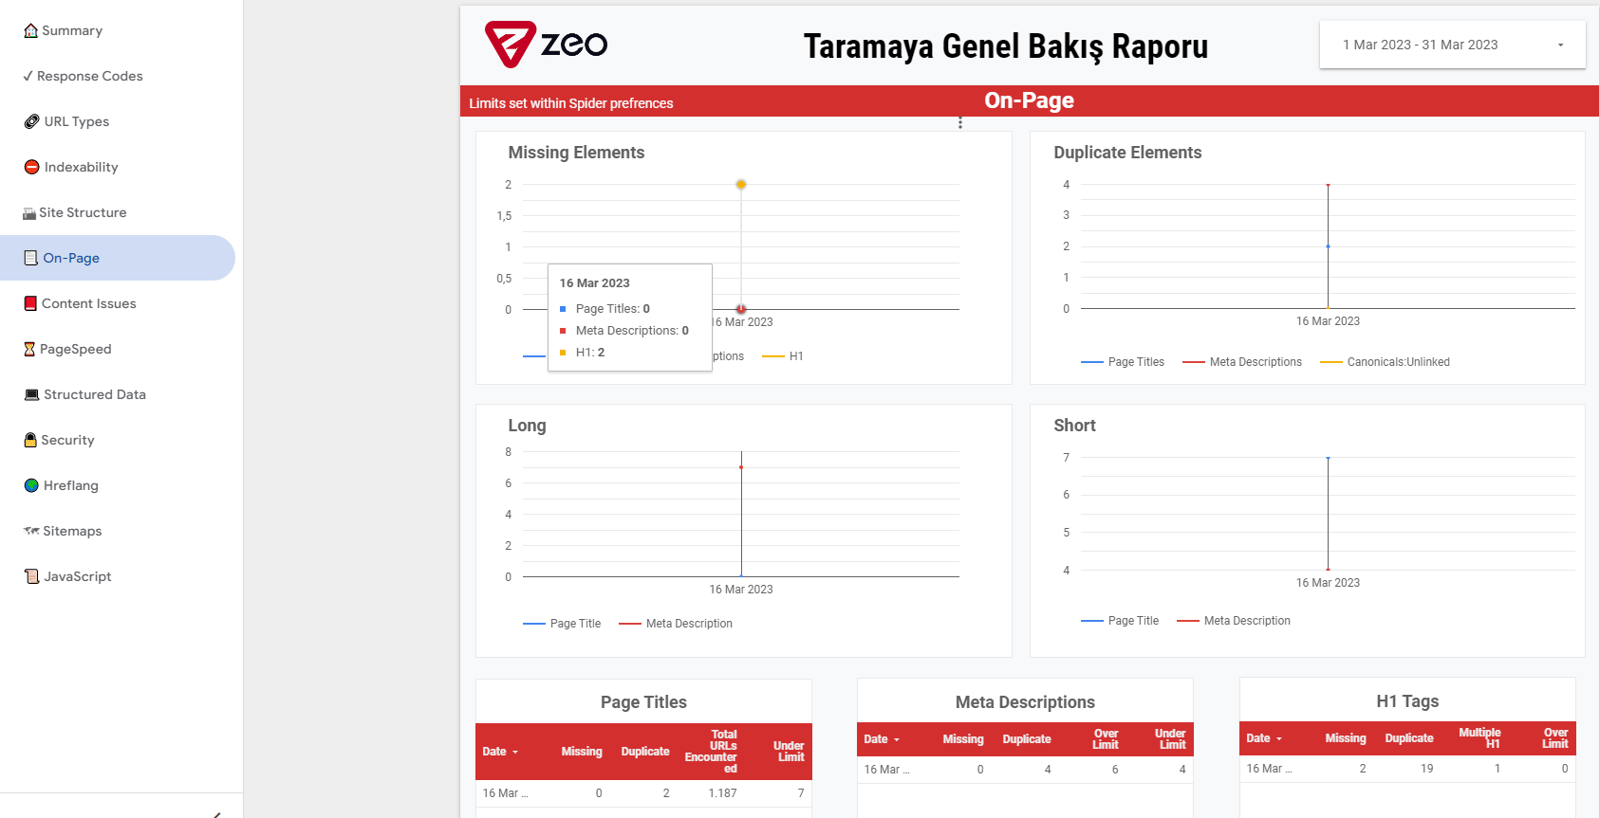
In fact, all the elements on the above pages are generally used to quickly notify you of site problems and important changes overall.
All items in the relevant template are as follows:
- Summary - Provides an overview of related items.
- Response Codes - Allows you to get the response codes of pages and information about blocked pages.
- URL Types - Allows you to regularly view data related to internal HTML, images, js files and similar elements.
- Indexability - Allows you to check general information for site-wide index status.
- Site Structure - Typically allows you to monitor if there has been a change in internal links.
- On-Page - Allows you to track changes in on-page elements.
- Content Issues - Allows you to track issues such as duplicate content, poor content, etc.
- Page Speed - Allows you to systematically track CWV performance and the impact of your efforts.
- Structured Data - Allows you to monitor the status of structured data across the site.
- Security - Allows you to check security issues and page-based http header control across your website.
- Hreflang - Allows you to perform hreflang validations, especially at the level of multilingual sites.
- Sitemaps - Allows you to perform a sitemap check.
- JavaScript - Allows you to quickly track Javascript-related optimization items.
After updating our related template, it will additionally be included in the template to be done with the URL Auditing-Google URL Auditing API.
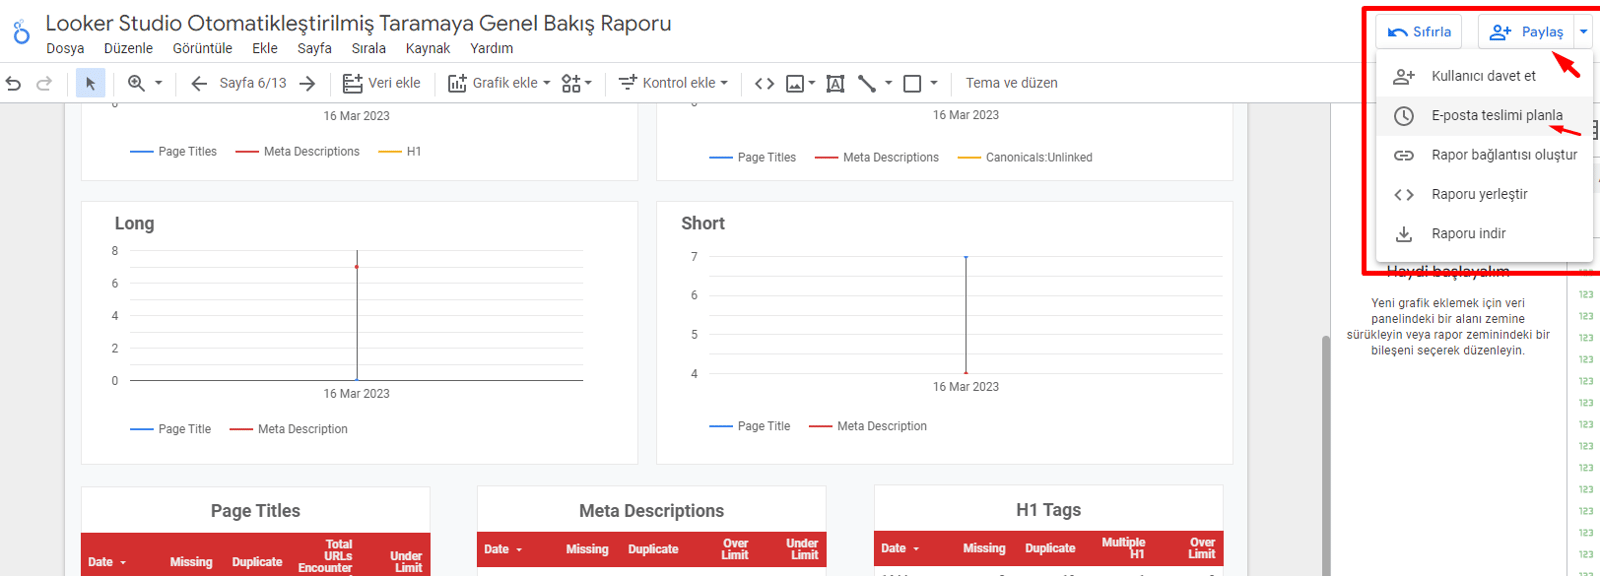
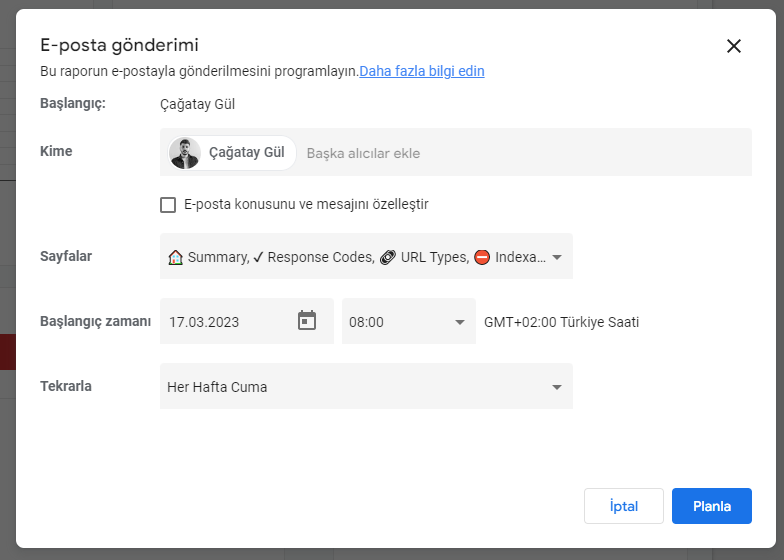
If you wish, you can enable email scheduling via Looker Studio so the report is shared daily, weekly, or monthly to the email addresses you choose.
This makes it easier for you to keep brand managers informed every time the report is updated.
For this, you need to apply the settings as in the image below.
That's all there is to it. I hope that this study can give you much more flexibility in your reports, both visually and in terms of conveying your work to brands in general.


